Marichyasana D Technique

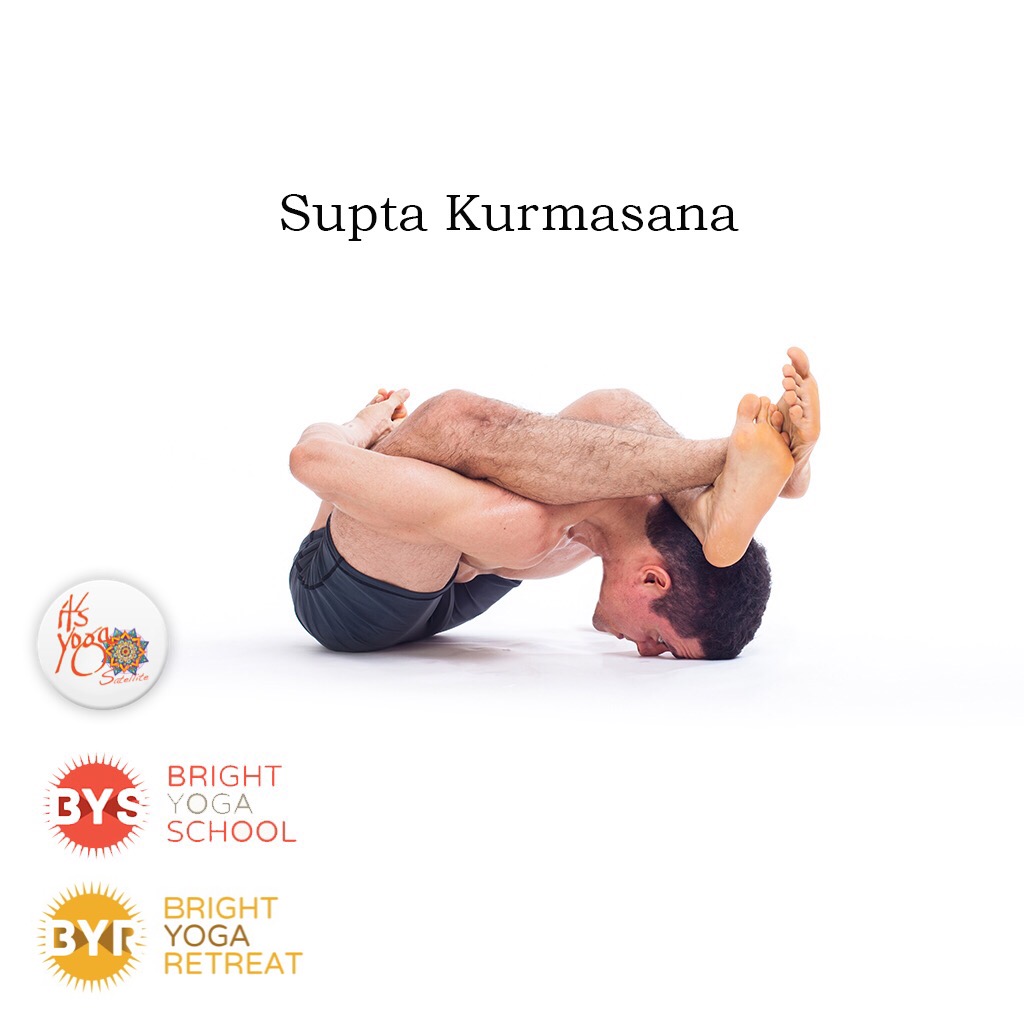
Before we move on to some technical details on how to get into the asana, let’s first mention some of the signs that can let you know whether your body is or isn’t ready to get into the full version of this posture…

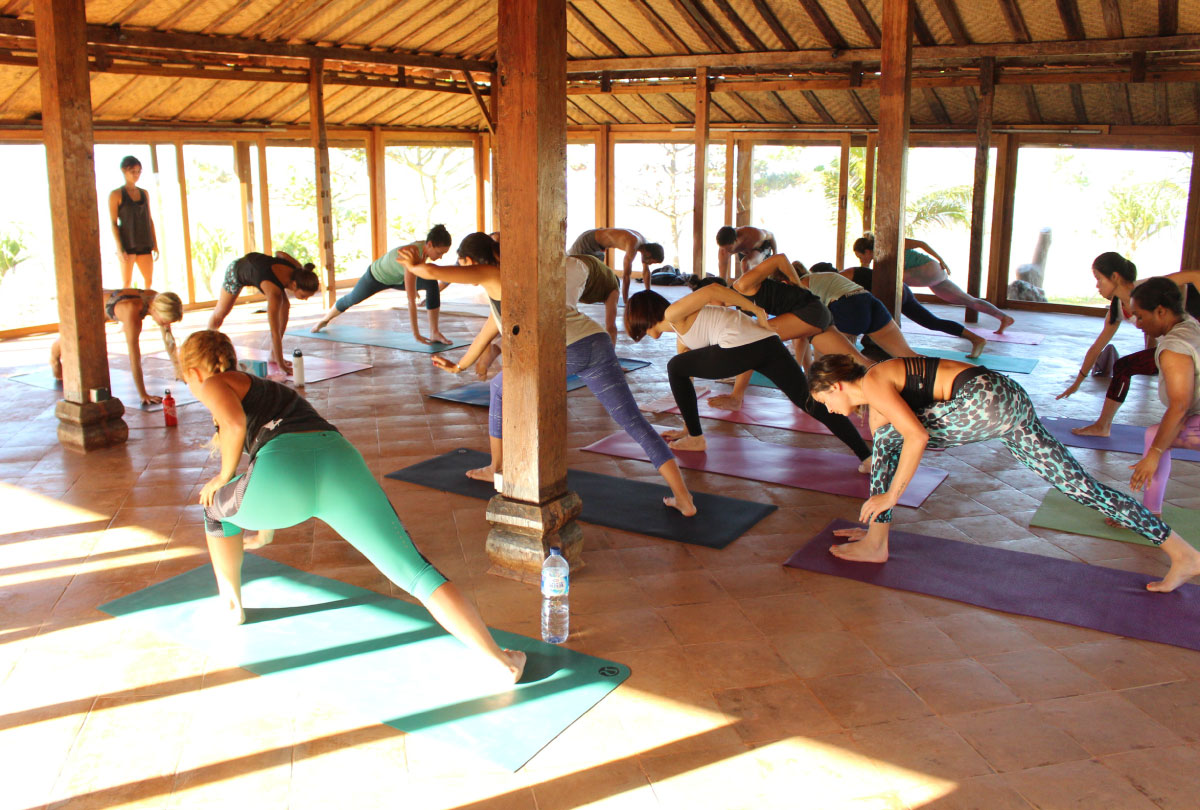
It is important to be able to bind deeply in Marichyasana D. If you get into this asana and there is still space between the armpit of the binding arm and the shinbone, it means that you have to pay more attention to the flexibility in either the thoracic spine (twisted position) or the internal rotation of the shoulder of the front arm. In this case, it will be advisable to work deeper and stay longer in postures like Parivritta Parsvakonasana – work on creating a deep bind in this standing twist by internally rotating the bottom shoulder, and your armpit must be connected with the thigh (or as close as possible to it). At the same time, send the top arm forward, open the chest and keep the back foot grounded

All this tips will allow you to build up the foundation for Marychiasana D. If binding is already possible (and there is little or no more space between the armpit and the shinbone), but you are experiencing pain on the lotus knee, it is better to first work on opening the hips in order to use the anatomical function of the hips instead of twisting the knee whenever you attempt to get into a full or half lotus posture.

One of the many benefits of Primary Series of Ashtanga Vinyasa Yoga is that all the previous asanas (before Marichyasana D) will help you to open the hips without straining the knee. In order to do this, we have to mindfully keep the sitting bone of the bent knee grounded on the floor in all the asymmetric seated posture – this will ensure that the hip of the bent leg is properly open without creating too much tension in the knee. However, an exception to this is in Marichyasana A and B, where it is advisable to keep the sitting bone of the bent knee off the floor.

To work in the flexibility of the hips, feel free to stay more than five breaths in all the Janu Sirsasana and Marichyasana before Marichyasana D; doing this will prepare the hips for the deep external rotation you need to have in order to get into Marichyasana D. In the standing postures a similar principle in how to open the hips can be apply by grounding the back foot in all the asymmetric standing asanas.

If you can bind without a gap (between your armpit and shinbone) in Marichyasana C, and your knee is pain-free when you practice half or full lotus postures (especially in Marychiasana B), then your body is ready nearly ready to get into Marichyasana D.

How to get onto Marichyasana D on the right side:

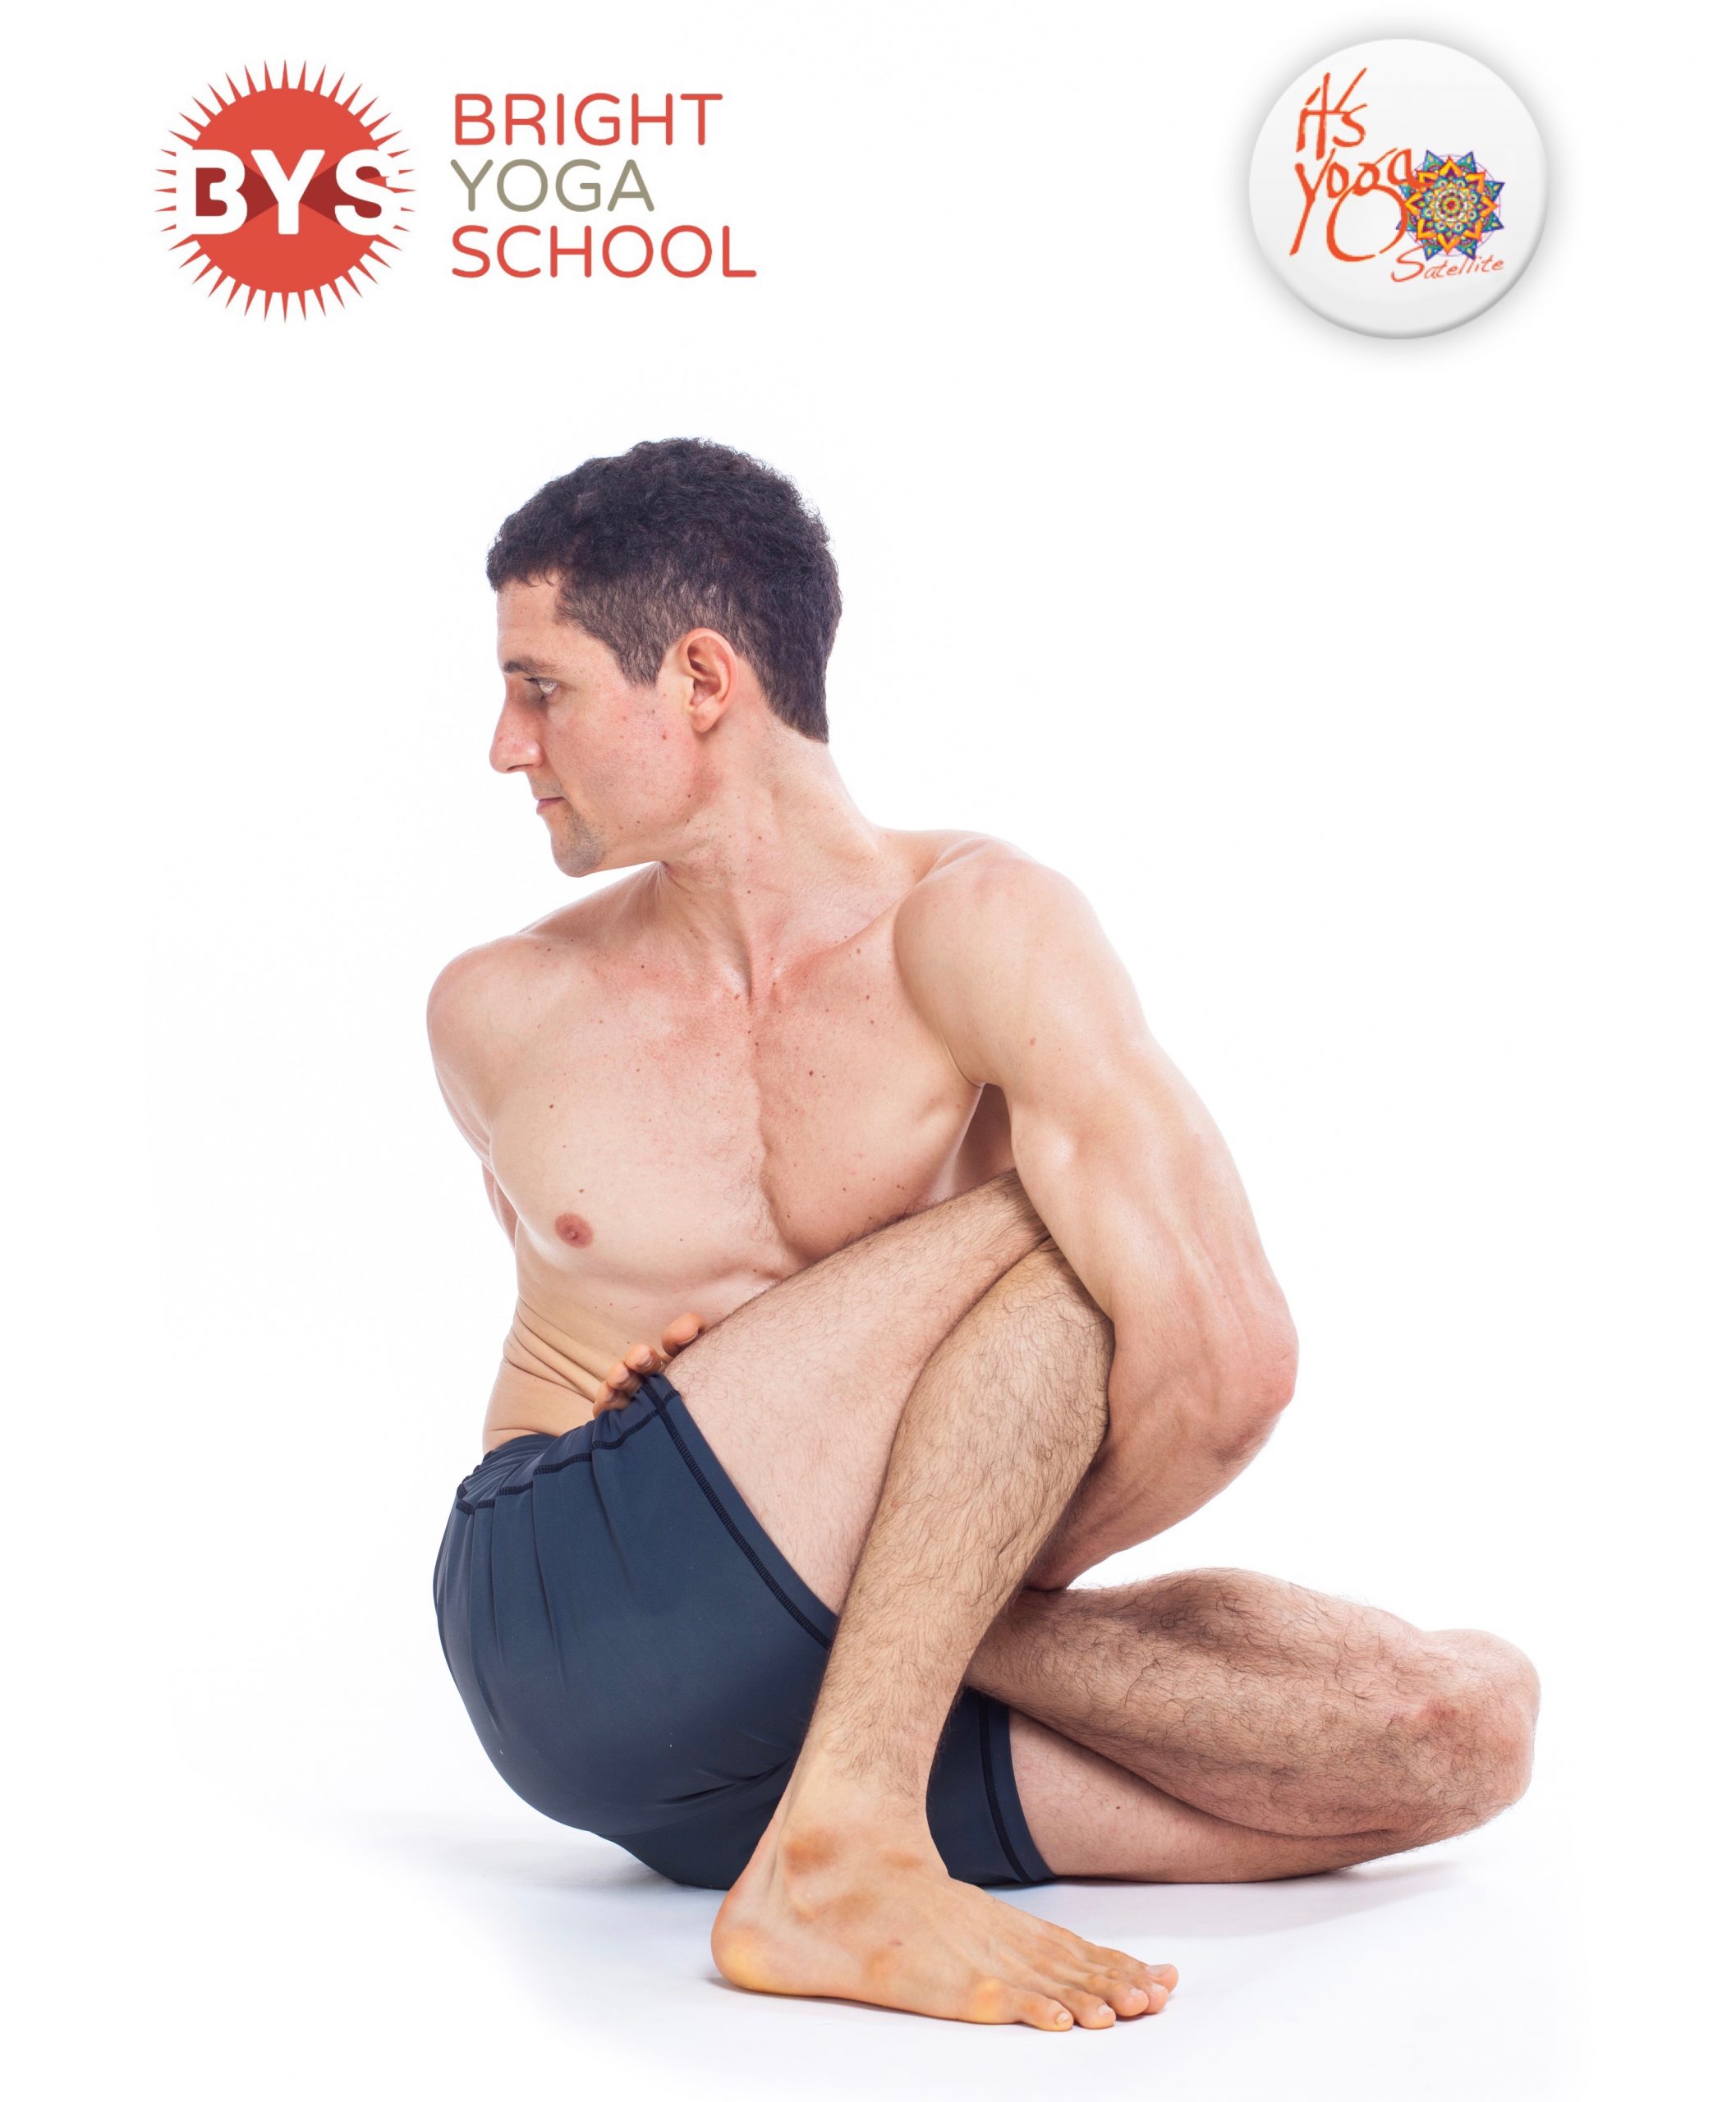
Inhale, bend the left knee and hold left ankle from behind. Bring the left heel close to the belly button. Exhale, use the external rotation of the hip and place the top of the left foot close to the crease of the right hip (half lotus posture).
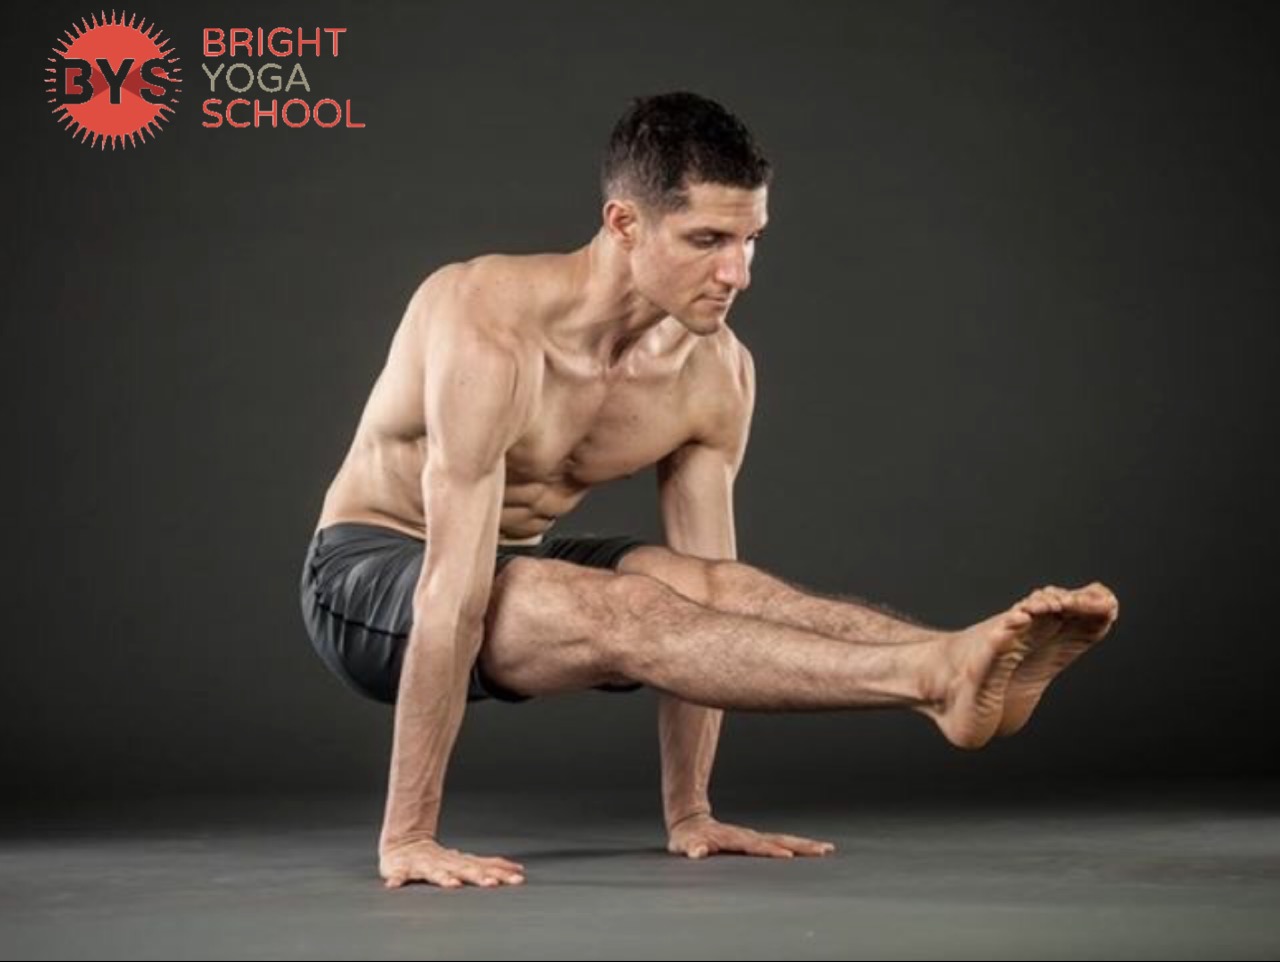
Lean on the lotus leg until the right sitting bone is off the floor and bend the right knee up to the chest; keep your right heel in line with the right sitting bone.
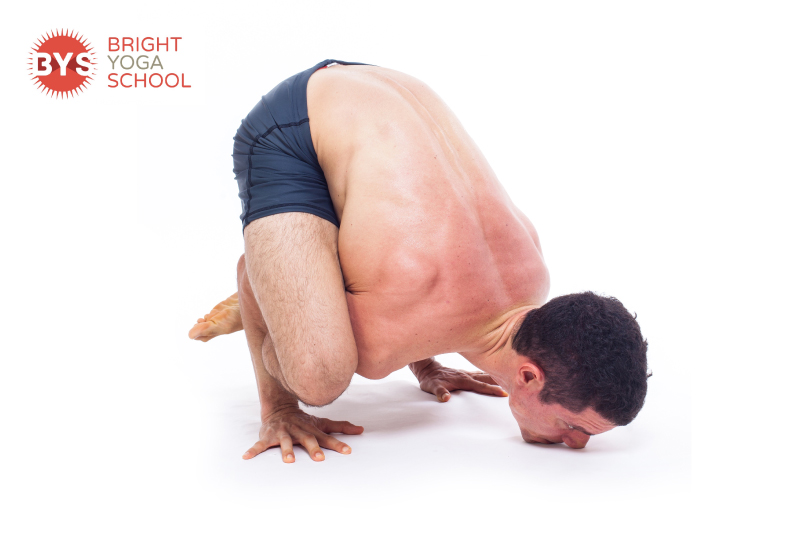
Inhale, extend the left side of the back (but the back should be slightly rounded). Exhale, lean across towards the right knee and bring your left armpit as close as possible to the right knee – at this point, is advisable to work on the internal rotation of the left arm in order to assist the thoracic spine into the twist.
Inhale, extend the right arm back and then rotate the arm inward so that your right thumb will be pointing down. Exhale, move the arm behind the back, connect both hands together as you continue to externally rotate the right shoulder.

To keep the knee of lotus leg safe, keep it down and allow the right sitting bone to come off the ground. Please notice that the breathing described above is a modification that will allow you to slowly prepare the body in order to get into the asana. When your body is open enough, we would like to advise that you to follow the correct breath according to the Ashtanga Tradition, which means that from Adho Mukha Svanasana (Sapta), on your inhale, jump to seated, and get directly into the twist.

The most important advise for this asana will be patience. When you accept your body’s limitations today and give enough time for your body to gradually open, you will begin to reap the benefits of the practice.

If you have any particular questions or concerns regarding Marichyasana D (or any part of your yoga practice), please feel free to email us at info@brightyoga.com

Have a good day, and enjoy your practice!

Parsvabakasana Technique


PARSVABAKASANA (SIDE CROW POSE)

Parsvabakasana or Side Crow Pose is an arm balance in the Ashtanga Vinyasa Yoga Advanced Series, as well as in the Rocket 2 and Rocket 3 sequences. This posture requires considerable arm strength, as well as flexibility in the forearm muscles and the thoracic spine, to be able to twist the spine and keep the shoulders balanced as the body weight is held over the hands.

Let us discuss some tips that can help you practice this asana in a safe way…
When you do Chaturanga Dandasana, notice the position of your upper body in relation to and your arms. Slowing down your Chaturanga Dandasana will help you build up a lot of strength to work your way into Parsvabakasana. Here is are some key actions you should pay attention to when practicing your Chaturanga:

Tuck the elbows inward, and keep them close to the body
Keep the shoulders in line or slightly above the shoulders. Aim to create a 90 degree angle with your arms so that you do not collapse the body weight down.
Push the shoulders down to engage the oblique muscles
Squeeze the inner thighs together
Completing your exhale will pull the belly in, creating core activation

Keep these in mind as you review your Chaturanga Dandasana, and remember to
always be mindful of your breath’s quality. Keep practicing this until you feel that your lower plank is solid in terms of breathing and alignment; once your are comfortable here, begin to practice your Parsvabakasana using these same techniques.

Now, let’s talk more about Side Crow Pose… Firstly, for this asana, it is important to take into account that your shoulders should be balanced or in the same line. Avoid collapsing your weight onto one shoulder to avoid imbalance and injury. In order to do this, keeping the legs engaged can make a big difference. When you practice Parsvabakasana, remember to:

Keep squeezing the inner thighs together
Spread the toes
Engage the quadriceps
Actively pull the legs back into the hip sockets

While it may seem like all the body weight is carried on the arms and hands in
this posture, it is just as important to pay attention to the leg activation, as this will actually make you feel lighter on your arms and hands when you lift up. Also, these tips will give you the ability to engage the lower abdominal region and keep your pelvic floor (Mula Bandha) active.

Consistency is always key in the Yoga System, so practice and apply these tips in your daily practice, particularly in your Chaturanga Dandasana. Paying more attention to your alignment and leg activation in this seemingly basic pose will train muscles in your body to help build your strength to get into Parsvabakasana. Keep practicing!

กระโดดขาตรง


การกระโดดไปด้านหลัง jumping back และการกระโดดไปดนหน้า Jumping through เป็นหนึ่งในการเคลื่อนไหวหลักที่คุณจะต้องเจอเวลาที่คุณต้องฝึกกลุ่มท่านั่งในการฝึก Ashtanga Vinyasa Primary Series ถ้าฝึกในท่าทางที่เหมาะสมและถูกหลักแล้วการกระโดดทั้งสองแบบจะช่วยร่างกายของคุณในเรื่องต่างๆดังต่อไปนี้
• สร้างพลังความร้อนภายในร่างกาย
• ลบล้างรูปแบบการเคลื่อนไหวในอาสนะก่อนหน้าที่ทำมา ในทุกๆอาสนะได้มีการส่งผ่านพลังงานโดยผ่านช่องนาดิ nadis (ช่องทางพลังงานที่ผ่านต่อไปทั่วร่างกาย) การ jumping back and Jumping through จะช่วยเคลียร์ช่องนาดิ เพื่อที่จะเตรียมพื้นที่ไว้สำหรับอาสนะถัดให้ผ่านช่องนาดิเช่นกัน
• ช่วยให้กล้ามเนื้อตรงหัวไหล่มีการผ่อนคลาย
• ช่วยให้กล้ามเนื้อหลังส่วนล่างมีการผ่อนคลาย
• สร้างความแข็งแรงให้กับแกนกลางของร่างกาย การมีกล้ามเนื้อแกนกลางที่แข็งแรงเป็นสิ่งที่สำคัญเมื่อคุณฝึกในชุดท่าระดับที่สองใน the Second Series ให้ลึกขึ้น
• เสริมสร้างพื้นฐานความสมดุลให้กับแขนทั้งสองข้าง ซึ่งคุณจะต้องเจอใน the Second Series and Advanced Series
• สร้างความสมดุลในส่วนของกระดูกสันหลัง เพราะส่วนใหญ่ท่านั่งใน Primary Series ไม่ค่อยมีความสมดุล การ jumping back/ Jumping through จะช่วยจัดระเบียบกระดูกสันหลัง

เมื่อฝึกท่า Jumping through คำแนะนำคือให้เริ่มทำจากท่า Marichyasana D ทางด้านซ้ายก่อน อาสนะต่างๆถัดจากท่าบิดตัวลึกนี้ การ jumping through จะทำให้ช่วยทุ่นแรงและเวลา ซึ่งท้ายที่สุดแล้วจะช่วยคุณในการฝึกจำนวนของวินยาสะได้อย่างถูกต้องในการฝึกโยคะในระบบ the traditional Ashtanga Vinyasa

ความแตกต่างระหว่างการทำ jumping through ขาตรงกับการขาไขว้ขึ้นอยู่กับความยืดหยุ่นของกลุ่มกล้ามเนื้อขาด้านหลัง การ Jumping through ขาตรง ต้องมีความยืดหยุ่นมาพมควรในกล้ามเนื้อชิ้นนี้ แล้วจะต้องมีความยืดหยุ่นมากสักเพียงใดกันล่ะ ลองทดสอบตัวเองโดยใช้บททดสอบดังต่อไปนี้
1.นั่งยืดหน้าขาไปด้านหน้า
2.ค่อยๆเอนตัวไปด้านหน้า โดยไม่ใช้มือดึงตัวเองลงไป
3.เคลื่อนหน้าท้องให้ใกล้กับต้นขาเท่าที่จะทำได้โดยไม่บังคับตัวเอง จากนั้นยืดแขนไปข้างหน้า

ถ้าหากมือของคุณอย่างน้อยหนึ่งในสี่ของท่อนแขนส่วนล่างสามารถยืดผ่านเกินส่วนของฝ่าเท้า นั่นหมายความว่า ร่างกายคุณมีความยืดหยุ่นเพียงพอที่จะสามารถ กระโดด Jumping through ขาตรงได้ ถ้าคุณยังต้องการทดสอบความยืดหยุ่นของกลุ่มกล้ามเนื้อขาด้านหลัง และต้องการฝึก Jumping through แบบขาไขว้ คุณสามารถหาข้อมูลเพิ่มเติมได้ที่ http://www.itsyogasatellite.com/2015/02/08/how-to-jump-through-using-your-body-and-your-breathing/

หากคุณสามารถทำบททดสอบก่อนหน้าโดยไม่มีปัญหาได้แล้ว แต่ยังรู้สึกว่าการกระโดด Jumping through แบบขาตรงยังค่อนข้างท้าทายสำหรับคุณ ด้านล่างต่อไปนี้เป็นเทคนิคต่างๆที่ช่วยให้คุณฝึกท่านี้ได้ง่ายขึ้น

เมื่อเท้าของคุณยกจากพื้นได้แล้ว จากท่า Downward Facing Dog พยายามทำเข่าให้งอไว้เล็กน้อย ดึงหน้าขาให้ใกล้ชิดกับอกเหมือนกับคุณกำลังทำท่า Paschimottanasana ในอากาศ ในตอนเริ่มต้น อย่ายกสะโพกสูงเกินไป ให้เน้นไปที่การเคลื่อนไหวของสะโพกในแนวนอน จุดโฟกัสของคุณในระหว่างการฝึกควรอยู่ที่ด้านหน้า อาจจะประมาณ 1 ฟุตจากมือทั้งสองข้างของคุณ ซึ่งนี่เป็นเทคนิคที่ช่วยให้คุณเคลื่อนไปที่ด้านหน้า
พยายามดให้ไหล่อยู่เหนือข้อมือ
กระชับเท้าและนิ้วเท้าตลอดการเคลื่อนไหว
บีบต้นขาด้านในเข้าหากัน
กดมือทั้งสองข้างลงเพื่อเพิ่มพื้นที่ว่างระหว่างเท้าและพื้น
ท้ายสุด ถ้าคุณสามารถเคลื่อนขาของคุณผ่านได้ ในขณะที่คุณกำลังหย่อนตัวลงเพื่อที่จะนั่ง พยายามจำไว้ว่า ให้ไหล่นำข้อมือและสะโพกให้อยู่ด้านหลังข้อมือ
พวกเราทราบว่าข้อมูลค่อนข้างเยอะถ้าจะศึกษาและจำได้ในครั้งเดียว และบางส่วนของมีความยากในการจินตนาการท่า เพื่อที่จะช่วยให้คุณเข้าใจในหลักการเหล่านี้ได้ดีขึ้น ให้เข้าไปดูตามลิ้งนี้ว่าทิปเหล่านี้ช่วยในการเรื่องการเคลื่อนไหวได้อย่างไร : https://youtu.be/WaeKnTwgaHo

หากคุณมีคำถามหรือข้อสงสัยเกี่ยวกับหัวข้อนี้หรืออยากทราบเพิ่มเติมเกี่ยวกับการฝึกโยคะ สามารถติดต่อเราได้ที่ info@brightyoga.com เรามีความยินดีเป็นอย่างยิ่งที่จะได้พูดคุยกับคุณ ขอให้สนุกกับการฝึก
นมัสเต
ทีมงาน Bright Yoga

การกระโดด Jump through โดยใช้ร่างกายและการหายใจ
การกระโดด Jump through คือการเคลื่อนไหวที่ต้องการความยืดหยุ่นของกล้ามเนื้อขาด้านหลังกล้ามเนื้อก้น และ ข้อมือ ที่ขึ้นอยู่กับความยืดหยุ่นของด้านหลังของท่อนแขนส่วนล่าง

ส่วนของร่างกายที่เกี่ยวข้อง
กล้ามเนื้อแกนกลาง กล้ามเนื้องอข้อต่อสะโพก และหัวไหล่
และสิ่งที่สำคัญคือ ไม่ว่าท่าที่ทำจะมีความเป็นไปไม่ได้มากเพียงใดก็ตาม ขอแค่ให้คุณลองฝึก และมีความสุขกับการฝึกในการทำก็พอ

เมื่อคุณพยายามกระโดด Jump through โปรดจำไว้ว่า
หายใจออก
1) งอขาให้เพียงพอที่จะยกสะโพกสูงขึ้นและสามารถใช้กล้ามเนื้อเนื้อขา ในช่วงที่คุณลดระดับขาลงจนกระทั่งก้นแตะเท้า นั่นหมายถึงว่าคุณจะเสียความสามารถในการใช้กล้ามเนื้อหน้าขาได้อย่างมีประสิทธิภาพ ลองนึกภาพว่าคุณกระโดดในท่ายืนและย่อขาตอนลงมาสู่พื้นในท่า Squat การกระโดดแบบนี้ค่อนข้างจะเป็นไปด้วยความยาก
2) การเพ่ง ในขณะที่งอเข่า ให้มองไปยังด้านหลังของฝ่ามือ เมื่อเท้าของคุณลอยจากพื้น ให้เพ่งจุดมองไปที่ด้านหน้า
หายใจเข้า
3) ในช่วงที่เท้าลอยจากพื้น กดเข่าให้ใกล้อกการทำเช่นนี้จะทำให้หลังของคุณมีลักษณะโค้ง ลักษณะเช่นนี้จะทำให้คุณสามารถใช้ความยาวของแขนได้อย่างเต็มที่และมีประสิทธิภาพ นอกจากนี้การทำเช่นนี้จะทำให้แกนกลางของลำตัวทำงานโดยอัตโนมัติ (ในภาพที่ 2 และ 3 ไม่มีช่องว่างระหว่างหน้าขาและอก)

4) กระชับขาโดยกระดกปลายเท้าเข้าหาหน้าแข้งของขาฝั่งตรงข้าม (สังเกตลักษณะของเท้าในภาพที่ 2)
5)ให้หัวไหล่เคลื่อนไปด้านหน้าของข้อมือ และให้น้ำหนักของร่างกายไว้ที่มือ สิ่งที่จะช่วยป้องกันคุณไม่ให้ล้มและกระแทกพื้นก็คือปลายนิ้วมือทั้งหมด กดพวกมันลง โดยเฉพาะนิ้วชี้กับนิ้วโป้ง (สังเกตมุมระหว่างหัวไหล่และข้อมือในภาพที่ 2 และ 3)
หายใจออก
6) ขั้นตอนนี้เป็นขั้นตอนที่คนส่วนมากมักจะหยุดชะงัก หากเท้าของคุณแตะพื้น ให้พยุงตำแหน่งที่คุณกำลังทำและทำเท่าที่ทำได้แบบเต็มที่ โดยยังคงกดมือกับพื้นไว้ หายใจได้ตามที่ร่างกายต้องการ
7) ถ้าคุณสามารถสอดขาผ่านได้ให้ลองเหยียดขาออก

ผมหวังว่าเทคนิคที่กล่าวมานี้พอที่จะช่วยคุณได้ หากข้อมูลทั้งหมดนี้มีประโยชน์สำหรับคุรและคนอื่นๆ คุณสามารถแชร์ได้

ขอบคุณมากครับ
นมัสเต

Bhujapindasana Technique


Bhujapindasana (Shoulder-Pressing Pose) is the first arm balance you will encounter when you practice the traditional Ashtanga Vinyasa Primary Series. This pose will require a lot of core activation, and a good way to strengthen the core is to practice Navasana (Boat Pose) and pay attention in all the jumping backs and through. However, Bhujapindasana, like many other postures, will require not only core strength, but also a combination between flexibility and strength in many different parts of the body.

Let’s break this posture down…

First step: preparation. In order to move the legs around the arms, you will need flexibility on your hip extensors (glutes and hamstrings) and adductors (inner thighs). If you can bring your legs around your arms – at least above the elbows – and cross your feet, this could be a good place to stay if you do not have enough strength to move forward to the next step yet.

Second step: crown of the head or chin down towards the mat. Use your exhalation to move all the way down. In this movement, you will need flexibility and strength in different parts of the body at the same time.

In terms of flexibility, your ability to flex the wrist will depend on the flexibility at the back of your forearm and the strength at the front of the forearm – these two groups of muscles will compensate each other in order to stabilize the wrist as you move your chin or head down. To be able to really engage the muscles at the front of the forearm, it is advisable to press the fingertips and the knuckles of your hands firmly down, especially the base of the thumb, index, and middle fingers.

From here, to get into the full version of the pose, it is also necessary to be able to extend your chin without collapsing the back of the neck too much – this leads us into the next aspect, which is strength.

With regards to strength, your core and shoulders have to be able to support you as you move all the way down, as well as when you hold the posture for 5 deep breaths. In order to do this, always keep your back rounded, as this action will help keep your belly or core active. Also, fully exhaling will engage the transverse abdominal muscles. Squeeze the elbows in just enough to engage the muscles on the chest (pectoralis).

Another tip, which can make a big difference in the posture has to do with the legs. Our legs are directly related with the Mula Bandha (the root lock) and the lower abdominal area activation. In order to awaken these areas, keep the toes activated and squeeze the inner thighs together.

If you are new to this pose, and you are worried about falling forward, place a pillow in front of you, or move yourself backwards on your mat, so that you will have a softer surface to support the impact in case you will not be able to control the movement yet.

Remember to always keep practicing and be patient with the process. Dedication and diligence will get you there and beyond =) Have a good practice today!

Jumping Through with Straight Legs


Along with jumping back, jumping through is one of the most common movements you will encounter when practicing the seated postures in the Ashtanga Vinyasa Primary Series.

When practiced properly, jumping back/through will help your body do the following:

  • Create internal heat
  • Clear up the energetic movement generated in the previous asana. As every asana moves energy through the nadis (energy channels throughout the body), jumping back and jumping through helps clear the nadis to make space for the next asana to move energy through them as well
  • Release tension from the deltoids (the muscles at the tops of the shoulders)
  • Release the lower back
  • Strengthen the core muscles. Having a strong core is essential as you practice the deeper backbends of the Second Series
  • Build the foundation for more complex arm balances, which you will eventually encounter in the Second Series and Advanced Series
  • Keep your spine balanced. Since most of the seated postures in the Primary Series are asymmetrical, jumping back/through will help realign the spine

When practicing jumping through with straight legs, it is advisable to begin doing it from Marichyasana D on the left side onward. All the postures after this deep twist are symmetrical, so jumping through with straight legs will save energy and time, which will help you to eventually practice following the right number of vinyasas in the traditional Ashtanga Vinyasa method.

The difference between jumping through with crossed legs and with straight legs lies in the flexibility of your hamstrings – jumping through with straight legs requires flexibility in this area. How flexible do you need to be? Let’s find out by doing these simple steps:

1. Sit down with your legs extended straight in front of you

2. Begin to fold forward without using your hands to pull yourself down

3. Move your belly as close as possible to the thighs, and then extend your arms forward

If your hands and at least a quarter of your forearm can pass beyond the soles of your feet, this means that you have enough flexibility to jump through with straight legs. If you still need to work on your hamstring flexibilty, and would like to practice jumping through with crossed legs for now, you can find out more information about that movement here: http://www.itsyogasatellite.com/2015/02/08/how-to-jump-through-using-your-body-and-your-breathing/

If you can perform the previous exercise with no problem, but are still finding jumping through with straight legs a bit challenging, here are some techniques to help you flow through this movement with more ease:

  • As soon as your feet lift off from the ground (as you hop up from Downward Facing Dog), keep the knees slightly bent, and press your thighs close to your chest as if you are trying to do Paschimottanasana in the air
  • To start off, don’t lift your hips up too high; focus more on moving the hips in a horizontal line
  • Your drishti (gazing point) should be forward, perhaps 1 foot in front of your hands. This is subtle, yet very helpful technique to direct the movement forward
  • Keep the shoulders forward, in front of the line of the wrists
  • Keep the feet flexed and toes actively spread throughout the movement
  • Squeeze the inner thighs together
  • Actively push the hands down to create more space between your feet and the ground

Finally, if you are able to move your legs through, as you lightly lower down to sit, remember to always keep your shoulders in front of your wrists, and your hips should always stay behind the wrists.

We know it is a lot of information to absorb all at once, and some of them are difficult to imagine. To help you understand all of these tips better, follow this link to see how all these tips create a flow of movements: https://youtu.be/WaeKnTwgaHo

If you have any questions or concerns with regard to this topic or any aspect of your yoga practice, feel free to contact us at info@brightyoga.com. We will be more than happy to help you. Enjoy your practice!

Namaste,

Bright Yoga Team

“Is my yoga practice leading me to the right direction?”

This is a very important that all practitioners must ask themselves – on and off the mat. The importance of this question lies in the fact that there are so many different styles of yoga practices, philosophies, and traditions available to us nowadays, all of them offerering the same promises: a healthier body, a calmer, more peaceful state of mind, an overall improvement of quality of life, and so on.

To be able to recognize the many benefits that yoga practice can offer, you must first choose the yoga style that is suitable to you – your age, your body’s capabilities and limitations, your lifestyle, and perhaps even your personality. There are so many options available to us now, and it is only a matter of choosing a practice that not only your body and mind benefit from, but also a practice that you enjoy. Once you have found the style of yoga that suits you best, then commitment to the practice is necessary if you really want to harvest the fruits of your yoga practice.

After you find the right yoga style for you, the next step is to find the right teacher, which could be very challenging. An important thing to keep in mind is to look for a teacher who also practices – one who practices what he/she teaches. This is essential because the way a teacher guides you through your practice will depend how he/she understands the practice himself/herself. Understanding the practice can only be realized through direct experience, and this experience can only be attained through regular practice.

If you’ve found both the right practice and the right teacher for you, congratulations. Now let’s discuss how you will be able to discern if your practice is leading you in the right direction.

Most likely, the first thing you will observe as you continue practicing is an improvement in your body and health. Yoga asanas develops a progressive increase in your level of flexibility, which helps the flow of blood, oxygen, and energy flow through your body with less restrictions. This, in turn, aids the practitioner to have a faster healing process, release of tension, and eventually, development of more body awareness. In order to move into the different postures in the yoga practice, practitioners must access different muscle groups by increasing their own level of awareness and connection with their own bodies. This increased awareness helps the practitioner recognize his/her own immeasurable capacities and, at the same time, gain an understanding of how to work in a gentle, progressive way through his/her own limitations.

Now, the most important, yet difficult part to comprehend in order to recognize if your practice is guiding you towards the right directions lies in your yoga practice’s mental and emotional well-being. A consistent yoga practice will provide you with a healthy body, which, in turn, yields to a healthy state of mind. A better/clearer state of mind allows you to perceive reality as it is, and not according to your own ideas and past experiences. The only way to achieve this state of mind is by paying attention to your mind’s activities whenever you are practicing.

After you have mastered awareness in your physical body, your awareness will eventually penetrate into more subtle aspects of your practice, allowing you to start learning and understanding how your mind works. The mind can be understood by watching or observing it as often as possible – not only during the practice, but also in daily life. The mental side of yoga can be the most difficult aspect of the practice, and this is the reason why it is immensely essential that the teacher/s you choose to guide you have their own committed self practice.

These days, many misunderstand the practice, thinking that it is merely a physical exercise, and tend to overlook the mindful aspect of it. Not paying attention to the mind can lead to feelings of anger, desire, and delusion, which are gates to negative conditions that can only be prevented if we pay attention to our mind, and if your teacher has a correct understanding about the true nature of the mind. Not only is it important to revceive guidance from your yoga teacher; it is just as significant to find guidance fom your inner teacher, which is your self awareness.

Anger, desire, and delusion are three negative emotions that every single human being has, but some people are able to cope with or handle these more than others. The mindful practice to reduce these negative emotions is to observe them, acknowledge them, and then let them go. People who do not practice this may suffer even further from many other negative conditions such as violence, attachment, and greed to name a few.

So how can you tell if your teacher is truly observing his/her mind when he/she practices? If your teacher commits him/herself to the practice in a correct manner, he/she should have vital qualities that every yoga teacher and human being must have: love, kindness, and compassion. You can eventually cultivate these three qualities by observing your mind and acknowledging both the negative and positive conditions it has. One you have acquired love, kindness, and compassion, you can then share these with others.

Most of the yoga techniques offered all around the world can be truly life-changing; however, if you practice under the perception with the wrong teacher, you will get the wrong result. Always keep in mind that ever single experience – “good” or “bad” – is full of knowledge, if only you allow yourself to observe them, accept them, and let them go. So, keep practicing, constantly try to observe your self and your mind, always be present, and just surrender to the moment.

How to work toward Supta Kurmasana

Supta Kurmasana is one of the deepest hip openers in Primary Series of Ashtanga Vinyasa Yoga. This posture require: deep external rotation in the hips, deep flexion in the spine and a deep inner rotation in the shoulder join. If you have any restriction in your body in these areas, you should considerer the idea to hold the previous postures for a bit longer in order to allow your body to slowly open.

In standing series, a deep Prasarita Padottanasana A will promote a deeper flexion in the spine. This action will support, not only Supta kurmasana, also kurmasana and other postures like Tittibasana, and Upavista Konasana. If you have hard time to get deep in Prasarita A is good idea to stay here for 8 breaths or more in order to allow your back to slowly open.

In seated postures, all the asanas from Janu Sirsasana to Kurmasana can help you to work really deep in all the anatomical movements mentioned above: external rotation in the hips, flexion in the spine and inner rotation in the shoulder.

In Janu A, B & C you will work more effectively in open the hips (external rotation) if you pay attention in ground the sitting bone of the bending leg. About the spine position, round your back in all the Janu Sirsasana will help you to train the core and open the lower back, getting you ready for Supta Kurmasana

To work in the inner rotation of the shoulders, all the Marichyasanas are great for this aim. In order to do this is very important to pay attention to the movement of the shoulder. When you bind keep the bending knee as close as possible to the side of the body and straight up, keep the heal behind the the Knee and press it down will help you to ground your foundation and work really deep in the shoulders and hips.

When you wrap your arm around try to reduce the space between your shinbone and your armpit, this will help you to work really deep in the inner rotation of the shoulder. In Marichyasana A & B move your chest forward and down and pull the knee backwards will help you to open the hips. If you can not get there yet, feel free to stay in all the Marichyasanas for 8 breaths or more, work with patient toward this.

Navasana, by squeezing the legs you will awake the lower abdominal region and if you slow down the breathing your core will get stronger. A strong core will help you to support the lower back when you put the legs behind the head in Supta Kurmasana

Bhujapindasana, will help you to work in your core in a deeper level specially if you jump into it, also holding your body weight in your arms will create strength back into the shoulder allowing you to bring more stability in this joint without compromise the flexibility you need to have for Supta Kurmasana

Kurmasana, in this asana is very important to keep your legs just a bit wider than your shoulders, when your arms are moving under the legs, bring your legs as close as possible to the shoulders, engage the quadriceps and lift the heals out of the floor. If this is possible Supta Kurmasana is about to happen =)

If Kurmasana as described above is not possible, stay for 8 breaths at least, specially in all the Janu Sirsanas and Marichyasanas.

Feel free to share this information, help us to spread the love of the practice

Thanks for reading

Namaste

Finding Mula Bandha

In ashtanga Vinyasa Yoga, teachers and practitioners describe three main spinal Bandhas: Mula Bandha, Uddiyana Bandha and Jalandhara Bandha

These are the most subtlest part of the practice, only after you have been open up your body through the practice and sharpen your awareness will be possible for you to start to feel these energetic locks within the body.
However if you approach to the Bandhas in certain ways you can create a deeper and quicker connection who can serve you to move with lightness, and injury free through the practice.

The easiest way to start to connect with Mula Bandha is by knowing the physical location. Mula Bandha the root lock is located in the pelvic floor area for men and for women is also include the muscles of the cervix, by knowing the location you will know where to rest your awareness in order to get in touch with this lock.

If you can not feel your pelvic floor and muscles of the cervix, Mula Bandha can be awake by activating the toes, quadriceps and specially the inner tights, by keeping these muscles active you will notice a huge and positive change in your practice.

When to do this?
If you want to awake Mula Bandha the easiest way is by getting in touch with these muscles as often as possible

Since you start the first Samasthiti of the practice all these group of muscles have to turn on, by doing this you will notice the following qualities in your practice.
1. Lightness in the lower limbs
2. Lengthening in the lower back
3. Engagement of the lower abdominal region
4. Jumping back and through can get easier
5. Jumping in Sun Salutations will fell much lighter
6. Your backbend practice will feel pain free and deeper, if you have enough flexibility in the upper body
When Mula Bandha is properly use you will have a clear sensation of feeling grounded and light at the same time. Please remember that this lock will assist you in maintain prana (life force or vital energy) inside of the body for a longer period of time and it will assist the movement of prana within the physical and energetic body, because of the subtle nature of the Prana the muscle activation in the areas described above should be just enough to feel grounded, supported and light through the practice without compromise the flexibility and the quality of the breathing

The quality of the breathing will help you to understand how much effort you have to apply when you engage these areas. To much effort will reduce your ability to breath, under activation of these muscles will give you a lot of freedom in the breathing but not enough support during the asana practice, find a middle way of activation is ideal.
Is like playing guitar to much tension in the string and the string will broke, to lose and it will not create sound only with the right amount of tension you will be able to create a proper sound

Apply this and let us know how your practice change

Thanks for reading feel free to share

Namaste

Rocket gets you there faster

Rocket are a very dynamics yoga routines base on Ashtanga Vinyasa Yoga created by Larry Schultz. This sequences will help you to build up strength in legs, core and shoulders, at the same time it will help you to create flexibility into the hips shoulders, allowing you to free your back

Larry use to said “flexible spine young body” the reason behind this is that a flexible spine will allow the energy to move freely reaching different parts of your body, this will help you to remove tension and energetic blockage assisting you in develop a deeper inner connection within yourself

More than a single routine rocket vinyasa yoga, is a system that you can follow and see result in your mind and body.
Larry was a genius in sequencing, he was able to recognize what your body lack. The rocket routines specially leaded by him, he was able to guide you through the journey with so much happiness, love and compassion, that by the moment you walked out of the class some of his wisdom hit you in the right place, he was able to help you to realize the best of you.

During my training with him in 2010, I understood how important is to have a teacher who is genuine in his teaching, a teacher who “teach what he practice and practice what he teach”, because his own consciousness and dedication in his sadhana help him to see a better version of yourself even when you was not able to see it

I feel blessing to find him and share time with him, he brought so much light into my life, that is why share this practice is something who make me feel passionate about it

Thanks very much to all my teachers specially to Larry to showed me the light and to taught me to listen the inner teacher

With Gratitude and love

How to work in folding forward in a safe way?

In many Yoga styles folding forward in both standing and seated is practiced very often, having the right understanding in how to use your body when you fold can help you to support your practice in a long term without injury.

One of the most common injuries these days is tear of the hamstring (body of the muscle) and tear or avulsion of tendon at the origin (semitendinosus, where the muscle meets the tendon). If you ever got this injury you will know that is take long time to heal, because the hamstring is one of the group of muscles we use more often. When we walk the quadriceps is slightly engage while the hamstring will be slightly stretch, that is why heal this type of injure will require lot of awareness and time in order to heal it

Having a closer look of the anatomy of the Hamstring will help us to have a better idea about the most common injured areas. In our body the muscles always support each other in order to create stability and movement, every time when you extend or flex any limb, in one side of the limb will be always a contracted group of muscles (agonist) and in the appositive side will be a stretched group of muscles (antagonist)

Having this in mind, in order to stretch the muscle in a safe way we have to pay attention in engage the opposite group of muscle. In case of the hamstring contracting the quadriceps will help you to stretch the hamstring in a safe an effective way. However, in order to make sure that the stretch is happening at the body of the muscle and not at the tendon, is very important that you apply the following tips in your practice:

  1. Move the hips forward in line with the heels, this action will force you to really engage the quadriceps, activate the toes and reduce the tension at the origin of the muscle
  2. Most of the body weight should be at the ball of the feet
  3. Heels grounded
  4. Engage your core when you move your body weight forward

This action will help you to stretch the hamstring in a safe an effective way.

In case that you already have any of the injured mentioned above a mindful way of practice can help you to speed up the healing process. Here there is some advises we have been sharing with our students:

  1. Fold forward just enough, respect your body condition at the moment, this will help you to create a sense of self support and acceptance
  2. When you fold forward keep the top of the hips pointing upward as much as possible, this will keep the sitting bone pointing downward, reducing the tension on the tendon.
  3. Allow more blood to reach the injured area, this will facilitate the healing process. This can be achieved by lean your legs against the wall, 10 minutes every day (make sure that you use a pillow to support your sacrum). Increase the blow supply will also increase the amount of nutrients and oxygen into the injured area

After applying this our students not only healed faster, they also found more comfort and ease within the practice

Let us know how is works on you

Feel free to share

Namaste