Karandavasana Technique


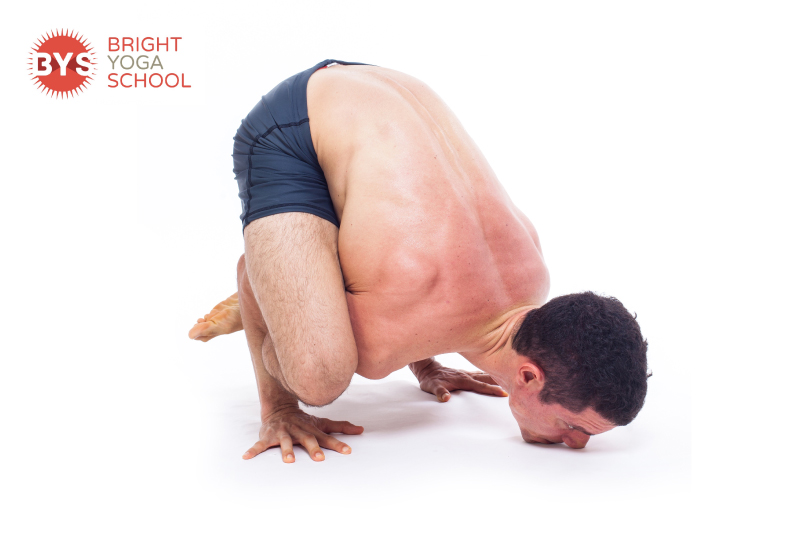
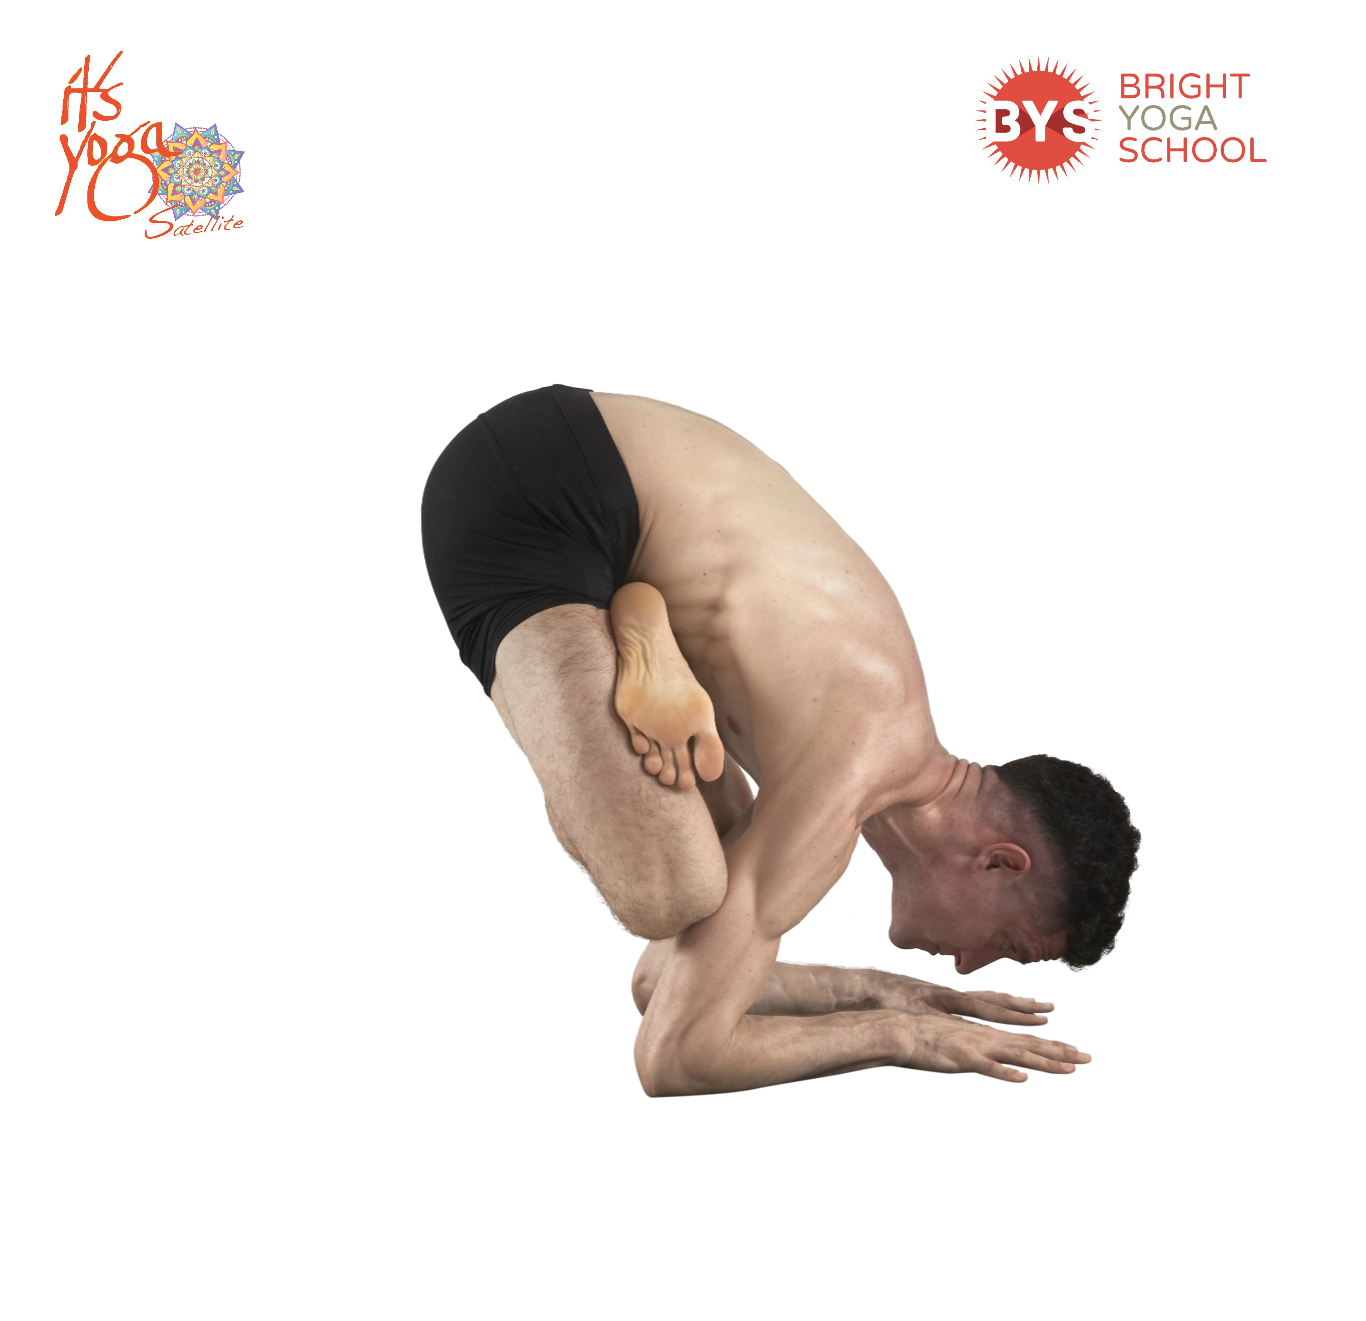
Karandavasana is one of the core postures in the Second Series of the Ashtanga Vinyasa practice. This asana requires a lot of strength in the shoulders, hips, and core because to enter the pose, you have to jump into Pincha Mayurasana in one inhale, and then build lotus on the legs as you exhale, and use that same breath out to slowly lower the legs down and stay for 5 breaths. All throughout this fast transition to Pincha Mayurasana with lotus legs, the shoulders, core, and bandhas must remain engaged to avoid collapsing on the shoulders, or else going bak up to Pincha Mayurasana after 5 breaths will be almost impossible.

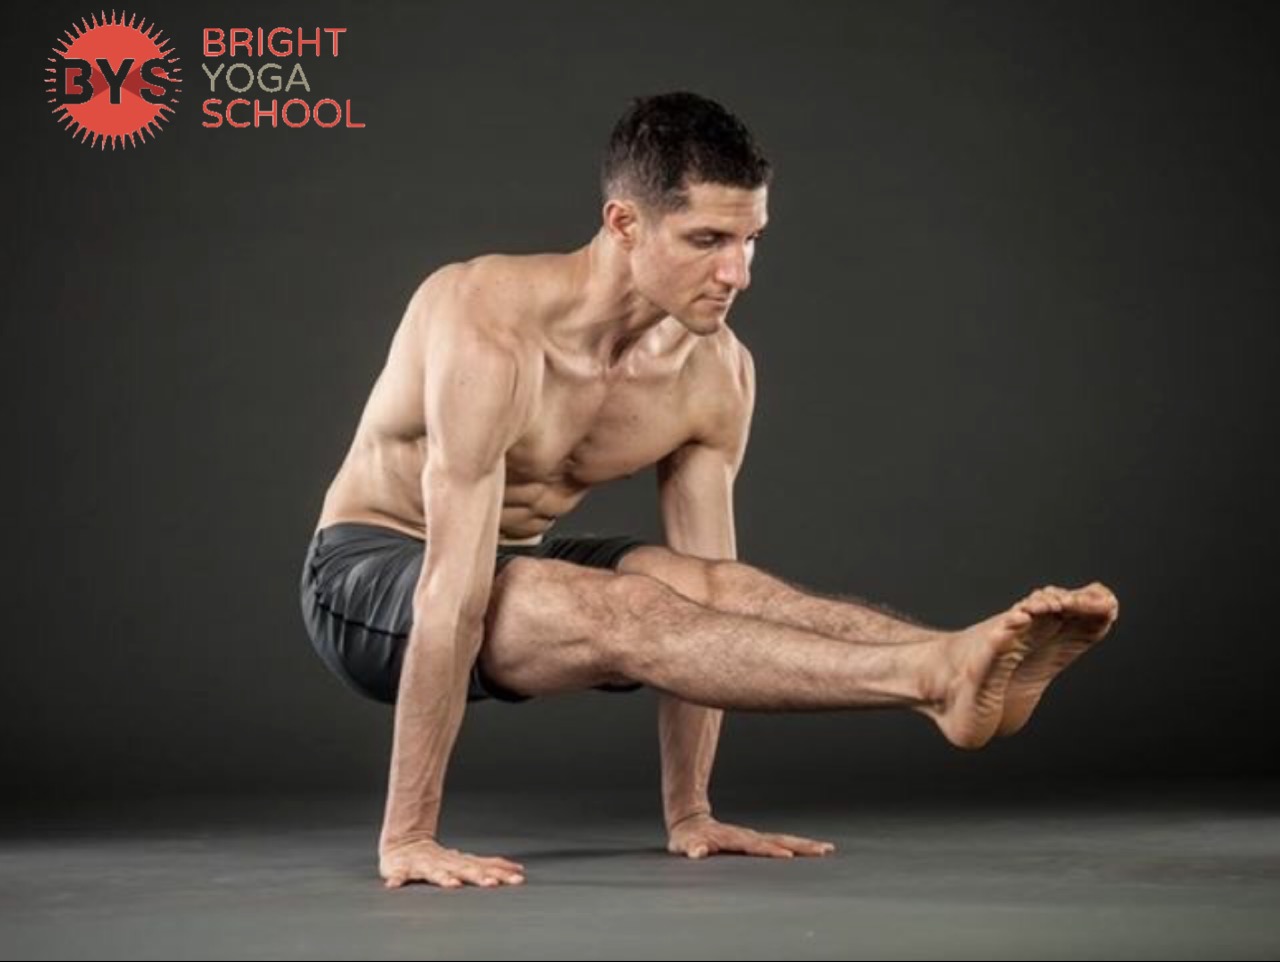
Some aspects of the Primary Series can help you build the foundation to work on Karandavasana in terms of core and bandha strength. In the Primary Series, all the jumping back in Vinyasas, when done properly, will help you build a solid connection with your bandhas, as well as good core and holder strength. If you have been stuck in Karandavasana for a while now, try to practice your jump backs without any sound as your feet touch the floor. This will teach you the following:

• How to use your breath more efficiently to control your movement

• Learn the biomechanics of the body. In this movement and in

Karandavasana, bringing the shoulders forward is key in order to control the action of going down, and slow down your jump back

• When jumping back, keep your spine as rounded as possible from the moment you move your hips up, back, and up — when you learn how to slightly bend at the elbows as you work on bringing the shoulders forward (as shown in the photo), it will help you build the foundation on how to get into Karanavasana

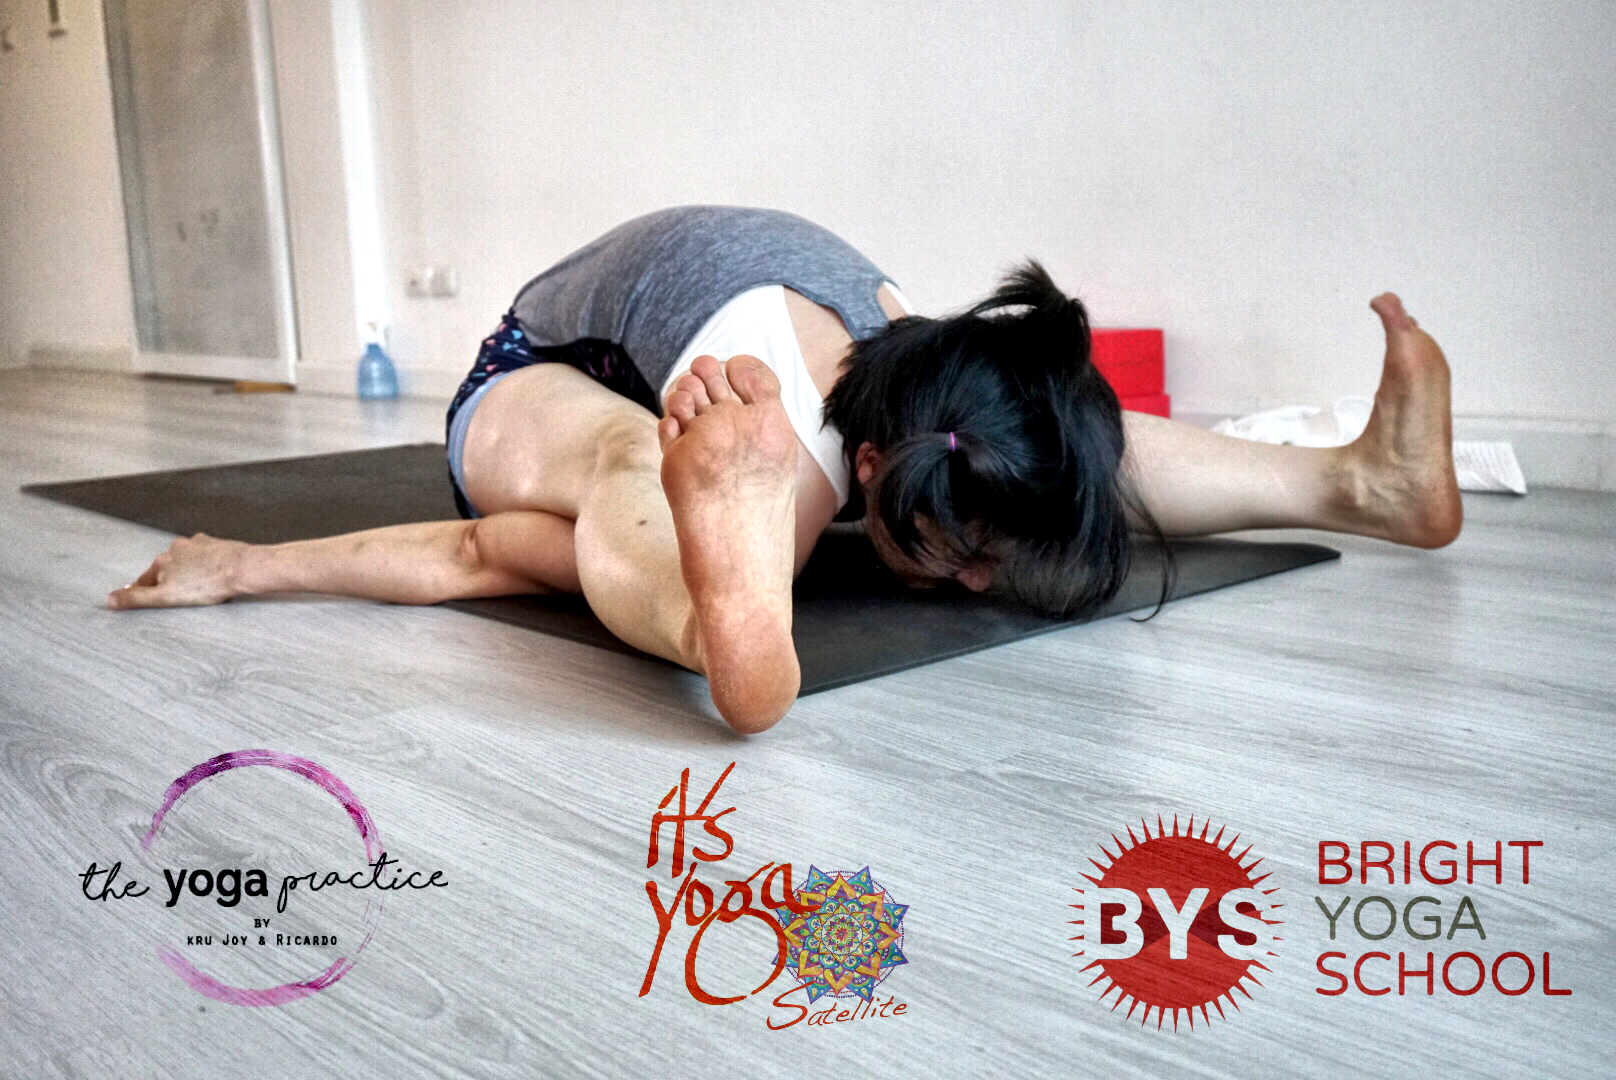
In addition to all this, Bhujapindasana (also from the Primary Series) is a great preparatory pose for Karanavasana. However, try to work on Bhujapindasana in a different way — after you cross your legs and use an exhale to move down, try not to let any part of your body (except for the hands, of course) to touch the floor. Lower the chin down, but work on keeping it hovering an inch above the floor and use the strength of the core, bandhas, and shoulders to hold the pose. At this point, it is very important not to collapse the body weight over your foundation. Instead, keep the back rounded, suck the belly in, and keep pushing down away from your foundation, creating a lifting feeling while you hold the pose. After 5 breaths inhale to come up and out of the asana, remind yourself to keep the toes off the floor at all time

Try and practice these techniques we discussed above to build up a strong connection with your bandhas, core, shoulders, and breath, all of which are necessary for Karandavasana.

Have a good and safe practice 

Kurmasana Technique


Kurmasana or Tortoise Pose is practiced after Bhujapidasana in the Ashtanga Vinyasa sequence. This asana requires a lot of flexibility on the hamstrings as it demands a deep external rotation on the hips, as well as strong activation of the core muscles.

As you can see in the final version of the posture, your heels are supposed to lift off the floor.

There are some postures that can help you to get deeper in Kurmasana such as Prasarita Padottanasana A and Marichyasana A-D, to name a few.

When you practice Prasarita Padottanasana A, keep your hands active as they touch the floor; however, fold forward by using your core muscles and the activation on your quadriceps more than your hands – this will allow you to access to deeper levels of flexibility in the posterior part of your body, which are the groups of muscles you need to work on opening before you can get into Kurmasana.

With regards to Marichyasana A-D – in A and B, as you bind, reach lower on your shinbone and work on the inner rotation of the shoulder of the binding arm. This is the same type of rotation you will use in Kurmasana, and later on in Supta Kurmasana.

For Marichyasana C and D: In the C variation, grounding the hip of the bending leg will assist you in opening the hips muscles that will allow you to deeply externally rotate your legs. In the D variation, when you bind, reduce the gap between the armpit and the shinbone and work on lowering the sitting bone of the bent knee toward the heel, as this will open the hip rotator muscles even deeper.

As you can see every single asana, will allow you to build the foundation for whatever posture is coming next. Keep in mind to always practice with awareness from the beginning until the end of the sequence.

Do you Want to learn more?
Join us in our Daily Mysore classes or Yoga Teacher Trainings in Thailand and Bali, Indonesia

กระโดดขาตรง


การกระโดดไปด้านหลัง jumping back และการกระโดดไปดนหน้า Jumping through เป็นหนึ่งในการเคลื่อนไหวหลักที่คุณจะต้องเจอเวลาที่คุณต้องฝึกกลุ่มท่านั่งในการฝึก Ashtanga Vinyasa Primary Series ถ้าฝึกในท่าทางที่เหมาะสมและถูกหลักแล้วการกระโดดทั้งสองแบบจะช่วยร่างกายของคุณในเรื่องต่างๆดังต่อไปนี้
• สร้างพลังความร้อนภายในร่างกาย
• ลบล้างรูปแบบการเคลื่อนไหวในอาสนะก่อนหน้าที่ทำมา ในทุกๆอาสนะได้มีการส่งผ่านพลังงานโดยผ่านช่องนาดิ nadis (ช่องทางพลังงานที่ผ่านต่อไปทั่วร่างกาย) การ jumping back and Jumping through จะช่วยเคลียร์ช่องนาดิ เพื่อที่จะเตรียมพื้นที่ไว้สำหรับอาสนะถัดให้ผ่านช่องนาดิเช่นกัน
• ช่วยให้กล้ามเนื้อตรงหัวไหล่มีการผ่อนคลาย
• ช่วยให้กล้ามเนื้อหลังส่วนล่างมีการผ่อนคลาย
• สร้างความแข็งแรงให้กับแกนกลางของร่างกาย การมีกล้ามเนื้อแกนกลางที่แข็งแรงเป็นสิ่งที่สำคัญเมื่อคุณฝึกในชุดท่าระดับที่สองใน the Second Series ให้ลึกขึ้น
• เสริมสร้างพื้นฐานความสมดุลให้กับแขนทั้งสองข้าง ซึ่งคุณจะต้องเจอใน the Second Series and Advanced Series
• สร้างความสมดุลในส่วนของกระดูกสันหลัง เพราะส่วนใหญ่ท่านั่งใน Primary Series ไม่ค่อยมีความสมดุล การ jumping back/ Jumping through จะช่วยจัดระเบียบกระดูกสันหลัง

เมื่อฝึกท่า Jumping through คำแนะนำคือให้เริ่มทำจากท่า Marichyasana D ทางด้านซ้ายก่อน อาสนะต่างๆถัดจากท่าบิดตัวลึกนี้ การ jumping through จะทำให้ช่วยทุ่นแรงและเวลา ซึ่งท้ายที่สุดแล้วจะช่วยคุณในการฝึกจำนวนของวินยาสะได้อย่างถูกต้องในการฝึกโยคะในระบบ the traditional Ashtanga Vinyasa

ความแตกต่างระหว่างการทำ jumping through ขาตรงกับการขาไขว้ขึ้นอยู่กับความยืดหยุ่นของกลุ่มกล้ามเนื้อขาด้านหลัง การ Jumping through ขาตรง ต้องมีความยืดหยุ่นมาพมควรในกล้ามเนื้อชิ้นนี้ แล้วจะต้องมีความยืดหยุ่นมากสักเพียงใดกันล่ะ ลองทดสอบตัวเองโดยใช้บททดสอบดังต่อไปนี้
1.นั่งยืดหน้าขาไปด้านหน้า
2.ค่อยๆเอนตัวไปด้านหน้า โดยไม่ใช้มือดึงตัวเองลงไป
3.เคลื่อนหน้าท้องให้ใกล้กับต้นขาเท่าที่จะทำได้โดยไม่บังคับตัวเอง จากนั้นยืดแขนไปข้างหน้า

ถ้าหากมือของคุณอย่างน้อยหนึ่งในสี่ของท่อนแขนส่วนล่างสามารถยืดผ่านเกินส่วนของฝ่าเท้า นั่นหมายความว่า ร่างกายคุณมีความยืดหยุ่นเพียงพอที่จะสามารถ กระโดด Jumping through ขาตรงได้ ถ้าคุณยังต้องการทดสอบความยืดหยุ่นของกลุ่มกล้ามเนื้อขาด้านหลัง และต้องการฝึก Jumping through แบบขาไขว้ คุณสามารถหาข้อมูลเพิ่มเติมได้ที่ http://www.itsyogasatellite.com/2015/02/08/how-to-jump-through-using-your-body-and-your-breathing/

หากคุณสามารถทำบททดสอบก่อนหน้าโดยไม่มีปัญหาได้แล้ว แต่ยังรู้สึกว่าการกระโดด Jumping through แบบขาตรงยังค่อนข้างท้าทายสำหรับคุณ ด้านล่างต่อไปนี้เป็นเทคนิคต่างๆที่ช่วยให้คุณฝึกท่านี้ได้ง่ายขึ้น

เมื่อเท้าของคุณยกจากพื้นได้แล้ว จากท่า Downward Facing Dog พยายามทำเข่าให้งอไว้เล็กน้อย ดึงหน้าขาให้ใกล้ชิดกับอกเหมือนกับคุณกำลังทำท่า Paschimottanasana ในอากาศ ในตอนเริ่มต้น อย่ายกสะโพกสูงเกินไป ให้เน้นไปที่การเคลื่อนไหวของสะโพกในแนวนอน จุดโฟกัสของคุณในระหว่างการฝึกควรอยู่ที่ด้านหน้า อาจจะประมาณ 1 ฟุตจากมือทั้งสองข้างของคุณ ซึ่งนี่เป็นเทคนิคที่ช่วยให้คุณเคลื่อนไปที่ด้านหน้า
พยายามดให้ไหล่อยู่เหนือข้อมือ
กระชับเท้าและนิ้วเท้าตลอดการเคลื่อนไหว
บีบต้นขาด้านในเข้าหากัน
กดมือทั้งสองข้างลงเพื่อเพิ่มพื้นที่ว่างระหว่างเท้าและพื้น
ท้ายสุด ถ้าคุณสามารถเคลื่อนขาของคุณผ่านได้ ในขณะที่คุณกำลังหย่อนตัวลงเพื่อที่จะนั่ง พยายามจำไว้ว่า ให้ไหล่นำข้อมือและสะโพกให้อยู่ด้านหลังข้อมือ
พวกเราทราบว่าข้อมูลค่อนข้างเยอะถ้าจะศึกษาและจำได้ในครั้งเดียว และบางส่วนของมีความยากในการจินตนาการท่า เพื่อที่จะช่วยให้คุณเข้าใจในหลักการเหล่านี้ได้ดีขึ้น ให้เข้าไปดูตามลิ้งนี้ว่าทิปเหล่านี้ช่วยในการเรื่องการเคลื่อนไหวได้อย่างไร : https://youtu.be/WaeKnTwgaHo

หากคุณมีคำถามหรือข้อสงสัยเกี่ยวกับหัวข้อนี้หรืออยากทราบเพิ่มเติมเกี่ยวกับการฝึกโยคะ สามารถติดต่อเราได้ที่ info@brightyoga.com เรามีความยินดีเป็นอย่างยิ่งที่จะได้พูดคุยกับคุณ ขอให้สนุกกับการฝึก
นมัสเต
ทีมงาน Bright Yoga

การกระโดด Jump through โดยใช้ร่างกายและการหายใจ
การกระโดด Jump through คือการเคลื่อนไหวที่ต้องการความยืดหยุ่นของกล้ามเนื้อขาด้านหลังกล้ามเนื้อก้น และ ข้อมือ ที่ขึ้นอยู่กับความยืดหยุ่นของด้านหลังของท่อนแขนส่วนล่าง

ส่วนของร่างกายที่เกี่ยวข้อง
กล้ามเนื้อแกนกลาง กล้ามเนื้องอข้อต่อสะโพก และหัวไหล่
และสิ่งที่สำคัญคือ ไม่ว่าท่าที่ทำจะมีความเป็นไปไม่ได้มากเพียงใดก็ตาม ขอแค่ให้คุณลองฝึก และมีความสุขกับการฝึกในการทำก็พอ

เมื่อคุณพยายามกระโดด Jump through โปรดจำไว้ว่า
หายใจออก
1) งอขาให้เพียงพอที่จะยกสะโพกสูงขึ้นและสามารถใช้กล้ามเนื้อเนื้อขา ในช่วงที่คุณลดระดับขาลงจนกระทั่งก้นแตะเท้า นั่นหมายถึงว่าคุณจะเสียความสามารถในการใช้กล้ามเนื้อหน้าขาได้อย่างมีประสิทธิภาพ ลองนึกภาพว่าคุณกระโดดในท่ายืนและย่อขาตอนลงมาสู่พื้นในท่า Squat การกระโดดแบบนี้ค่อนข้างจะเป็นไปด้วยความยาก
2) การเพ่ง ในขณะที่งอเข่า ให้มองไปยังด้านหลังของฝ่ามือ เมื่อเท้าของคุณลอยจากพื้น ให้เพ่งจุดมองไปที่ด้านหน้า
หายใจเข้า
3) ในช่วงที่เท้าลอยจากพื้น กดเข่าให้ใกล้อกการทำเช่นนี้จะทำให้หลังของคุณมีลักษณะโค้ง ลักษณะเช่นนี้จะทำให้คุณสามารถใช้ความยาวของแขนได้อย่างเต็มที่และมีประสิทธิภาพ นอกจากนี้การทำเช่นนี้จะทำให้แกนกลางของลำตัวทำงานโดยอัตโนมัติ (ในภาพที่ 2 และ 3 ไม่มีช่องว่างระหว่างหน้าขาและอก)

4) กระชับขาโดยกระดกปลายเท้าเข้าหาหน้าแข้งของขาฝั่งตรงข้าม (สังเกตลักษณะของเท้าในภาพที่ 2)
5)ให้หัวไหล่เคลื่อนไปด้านหน้าของข้อมือ และให้น้ำหนักของร่างกายไว้ที่มือ สิ่งที่จะช่วยป้องกันคุณไม่ให้ล้มและกระแทกพื้นก็คือปลายนิ้วมือทั้งหมด กดพวกมันลง โดยเฉพาะนิ้วชี้กับนิ้วโป้ง (สังเกตมุมระหว่างหัวไหล่และข้อมือในภาพที่ 2 และ 3)
หายใจออก
6) ขั้นตอนนี้เป็นขั้นตอนที่คนส่วนมากมักจะหยุดชะงัก หากเท้าของคุณแตะพื้น ให้พยุงตำแหน่งที่คุณกำลังทำและทำเท่าที่ทำได้แบบเต็มที่ โดยยังคงกดมือกับพื้นไว้ หายใจได้ตามที่ร่างกายต้องการ
7) ถ้าคุณสามารถสอดขาผ่านได้ให้ลองเหยียดขาออก

ผมหวังว่าเทคนิคที่กล่าวมานี้พอที่จะช่วยคุณได้ หากข้อมูลทั้งหมดนี้มีประโยชน์สำหรับคุรและคนอื่นๆ คุณสามารถแชร์ได้

ขอบคุณมากครับ
นมัสเต

Bhujapindasana Technique


Bhujapindasana (Shoulder-Pressing Pose) is the first arm balance you will encounter when you practice the traditional Ashtanga Vinyasa Primary Series. This pose will require a lot of core activation, and a good way to strengthen the core is to practice Navasana (Boat Pose) and pay attention in all the jumping backs and through. However, Bhujapindasana, like many other postures, will require not only core strength, but also a combination between flexibility and strength in many different parts of the body.

Let’s break this posture down…

First step: preparation. In order to move the legs around the arms, you will need flexibility on your hip extensors (glutes and hamstrings) and adductors (inner thighs). If you can bring your legs around your arms – at least above the elbows – and cross your feet, this could be a good place to stay if you do not have enough strength to move forward to the next step yet.

Second step: crown of the head or chin down towards the mat. Use your exhalation to move all the way down. In this movement, you will need flexibility and strength in different parts of the body at the same time.

In terms of flexibility, your ability to flex the wrist will depend on the flexibility at the back of your forearm and the strength at the front of the forearm – these two groups of muscles will compensate each other in order to stabilize the wrist as you move your chin or head down. To be able to really engage the muscles at the front of the forearm, it is advisable to press the fingertips and the knuckles of your hands firmly down, especially the base of the thumb, index, and middle fingers.

From here, to get into the full version of the pose, it is also necessary to be able to extend your chin without collapsing the back of the neck too much – this leads us into the next aspect, which is strength.

With regards to strength, your core and shoulders have to be able to support you as you move all the way down, as well as when you hold the posture for 5 deep breaths. In order to do this, always keep your back rounded, as this action will help keep your belly or core active. Also, fully exhaling will engage the transverse abdominal muscles. Squeeze the elbows in just enough to engage the muscles on the chest (pectoralis).

Another tip, which can make a big difference in the posture has to do with the legs. Our legs are directly related with the Mula Bandha (the root lock) and the lower abdominal area activation. In order to awaken these areas, keep the toes activated and squeeze the inner thighs together.

If you are new to this pose, and you are worried about falling forward, place a pillow in front of you, or move yourself backwards on your mat, so that you will have a softer surface to support the impact in case you will not be able to control the movement yet.

Remember to always keep practicing and be patient with the process. Dedication and diligence will get you there and beyond =) Have a good practice today!