“Is my yoga practice leading me to the right direction?”

This is a very important that all practitioners must ask themselves – on and off the mat. The importance of this question lies in the fact that there are so many different styles of yoga practices, philosophies, and traditions available to us nowadays, all of them offerering the same promises: a healthier body, a calmer, more peaceful state of mind, an overall improvement of quality of life, and so on.

To be able to recognize the many benefits that yoga practice can offer, you must first choose the yoga style that is suitable to you – your age, your body’s capabilities and limitations, your lifestyle, and perhaps even your personality. There are so many options available to us now, and it is only a matter of choosing a practice that not only your body and mind benefit from, but also a practice that you enjoy. Once you have found the style of yoga that suits you best, then commitment to the practice is necessary if you really want to harvest the fruits of your yoga practice.

After you find the right yoga style for you, the next step is to find the right teacher, which could be very challenging. An important thing to keep in mind is to look for a teacher who also practices – one who practices what he/she teaches. This is essential because the way a teacher guides you through your practice will depend how he/she understands the practice himself/herself. Understanding the practice can only be realized through direct experience, and this experience can only be attained through regular practice.

If you’ve found both the right practice and the right teacher for you, congratulations. Now let’s discuss how you will be able to discern if your practice is leading you in the right direction.

Most likely, the first thing you will observe as you continue practicing is an improvement in your body and health. Yoga asanas develops a progressive increase in your level of flexibility, which helps the flow of blood, oxygen, and energy flow through your body with less restrictions. This, in turn, aids the practitioner to have a faster healing process, release of tension, and eventually, development of more body awareness. In order to move into the different postures in the yoga practice, practitioners must access different muscle groups by increasing their own level of awareness and connection with their own bodies. This increased awareness helps the practitioner recognize his/her own immeasurable capacities and, at the same time, gain an understanding of how to work in a gentle, progressive way through his/her own limitations.

Now, the most important, yet difficult part to comprehend in order to recognize if your practice is guiding you towards the right directions lies in your yoga practice’s mental and emotional well-being. A consistent yoga practice will provide you with a healthy body, which, in turn, yields to a healthy state of mind. A better/clearer state of mind allows you to perceive reality as it is, and not according to your own ideas and past experiences. The only way to achieve this state of mind is by paying attention to your mind’s activities whenever you are practicing.

After you have mastered awareness in your physical body, your awareness will eventually penetrate into more subtle aspects of your practice, allowing you to start learning and understanding how your mind works. The mind can be understood by watching or observing it as often as possible – not only during the practice, but also in daily life. The mental side of yoga can be the most difficult aspect of the practice, and this is the reason why it is immensely essential that the teacher/s you choose to guide you have their own committed self practice.

These days, many misunderstand the practice, thinking that it is merely a physical exercise, and tend to overlook the mindful aspect of it. Not paying attention to the mind can lead to feelings of anger, desire, and delusion, which are gates to negative conditions that can only be prevented if we pay attention to our mind, and if your teacher has a correct understanding about the true nature of the mind. Not only is it important to revceive guidance from your yoga teacher; it is just as significant to find guidance fom your inner teacher, which is your self awareness.

Anger, desire, and delusion are three negative emotions that every single human being has, but some people are able to cope with or handle these more than others. The mindful practice to reduce these negative emotions is to observe them, acknowledge them, and then let them go. People who do not practice this may suffer even further from many other negative conditions such as violence, attachment, and greed to name a few.

So how can you tell if your teacher is truly observing his/her mind when he/she practices? If your teacher commits him/herself to the practice in a correct manner, he/she should have vital qualities that every yoga teacher and human being must have: love, kindness, and compassion. You can eventually cultivate these three qualities by observing your mind and acknowledging both the negative and positive conditions it has. One you have acquired love, kindness, and compassion, you can then share these with others.

Most of the yoga techniques offered all around the world can be truly life-changing; however, if you practice under the perception with the wrong teacher, you will get the wrong result. Always keep in mind that ever single experience – “good” or “bad” – is full of knowledge, if only you allow yourself to observe them, accept them, and let them go. So, keep practicing, constantly try to observe your self and your mind, always be present, and just surrender to the moment.
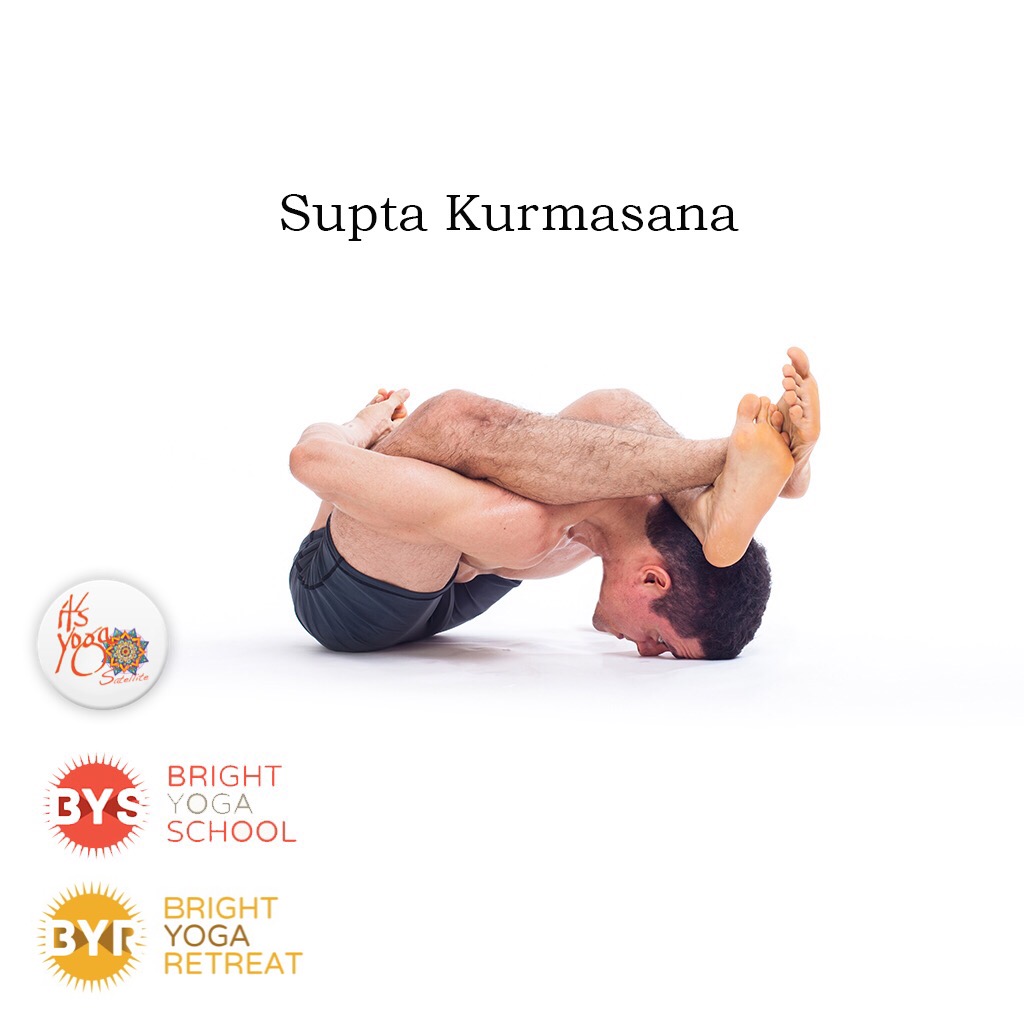
How to work toward Supta Kurmasana

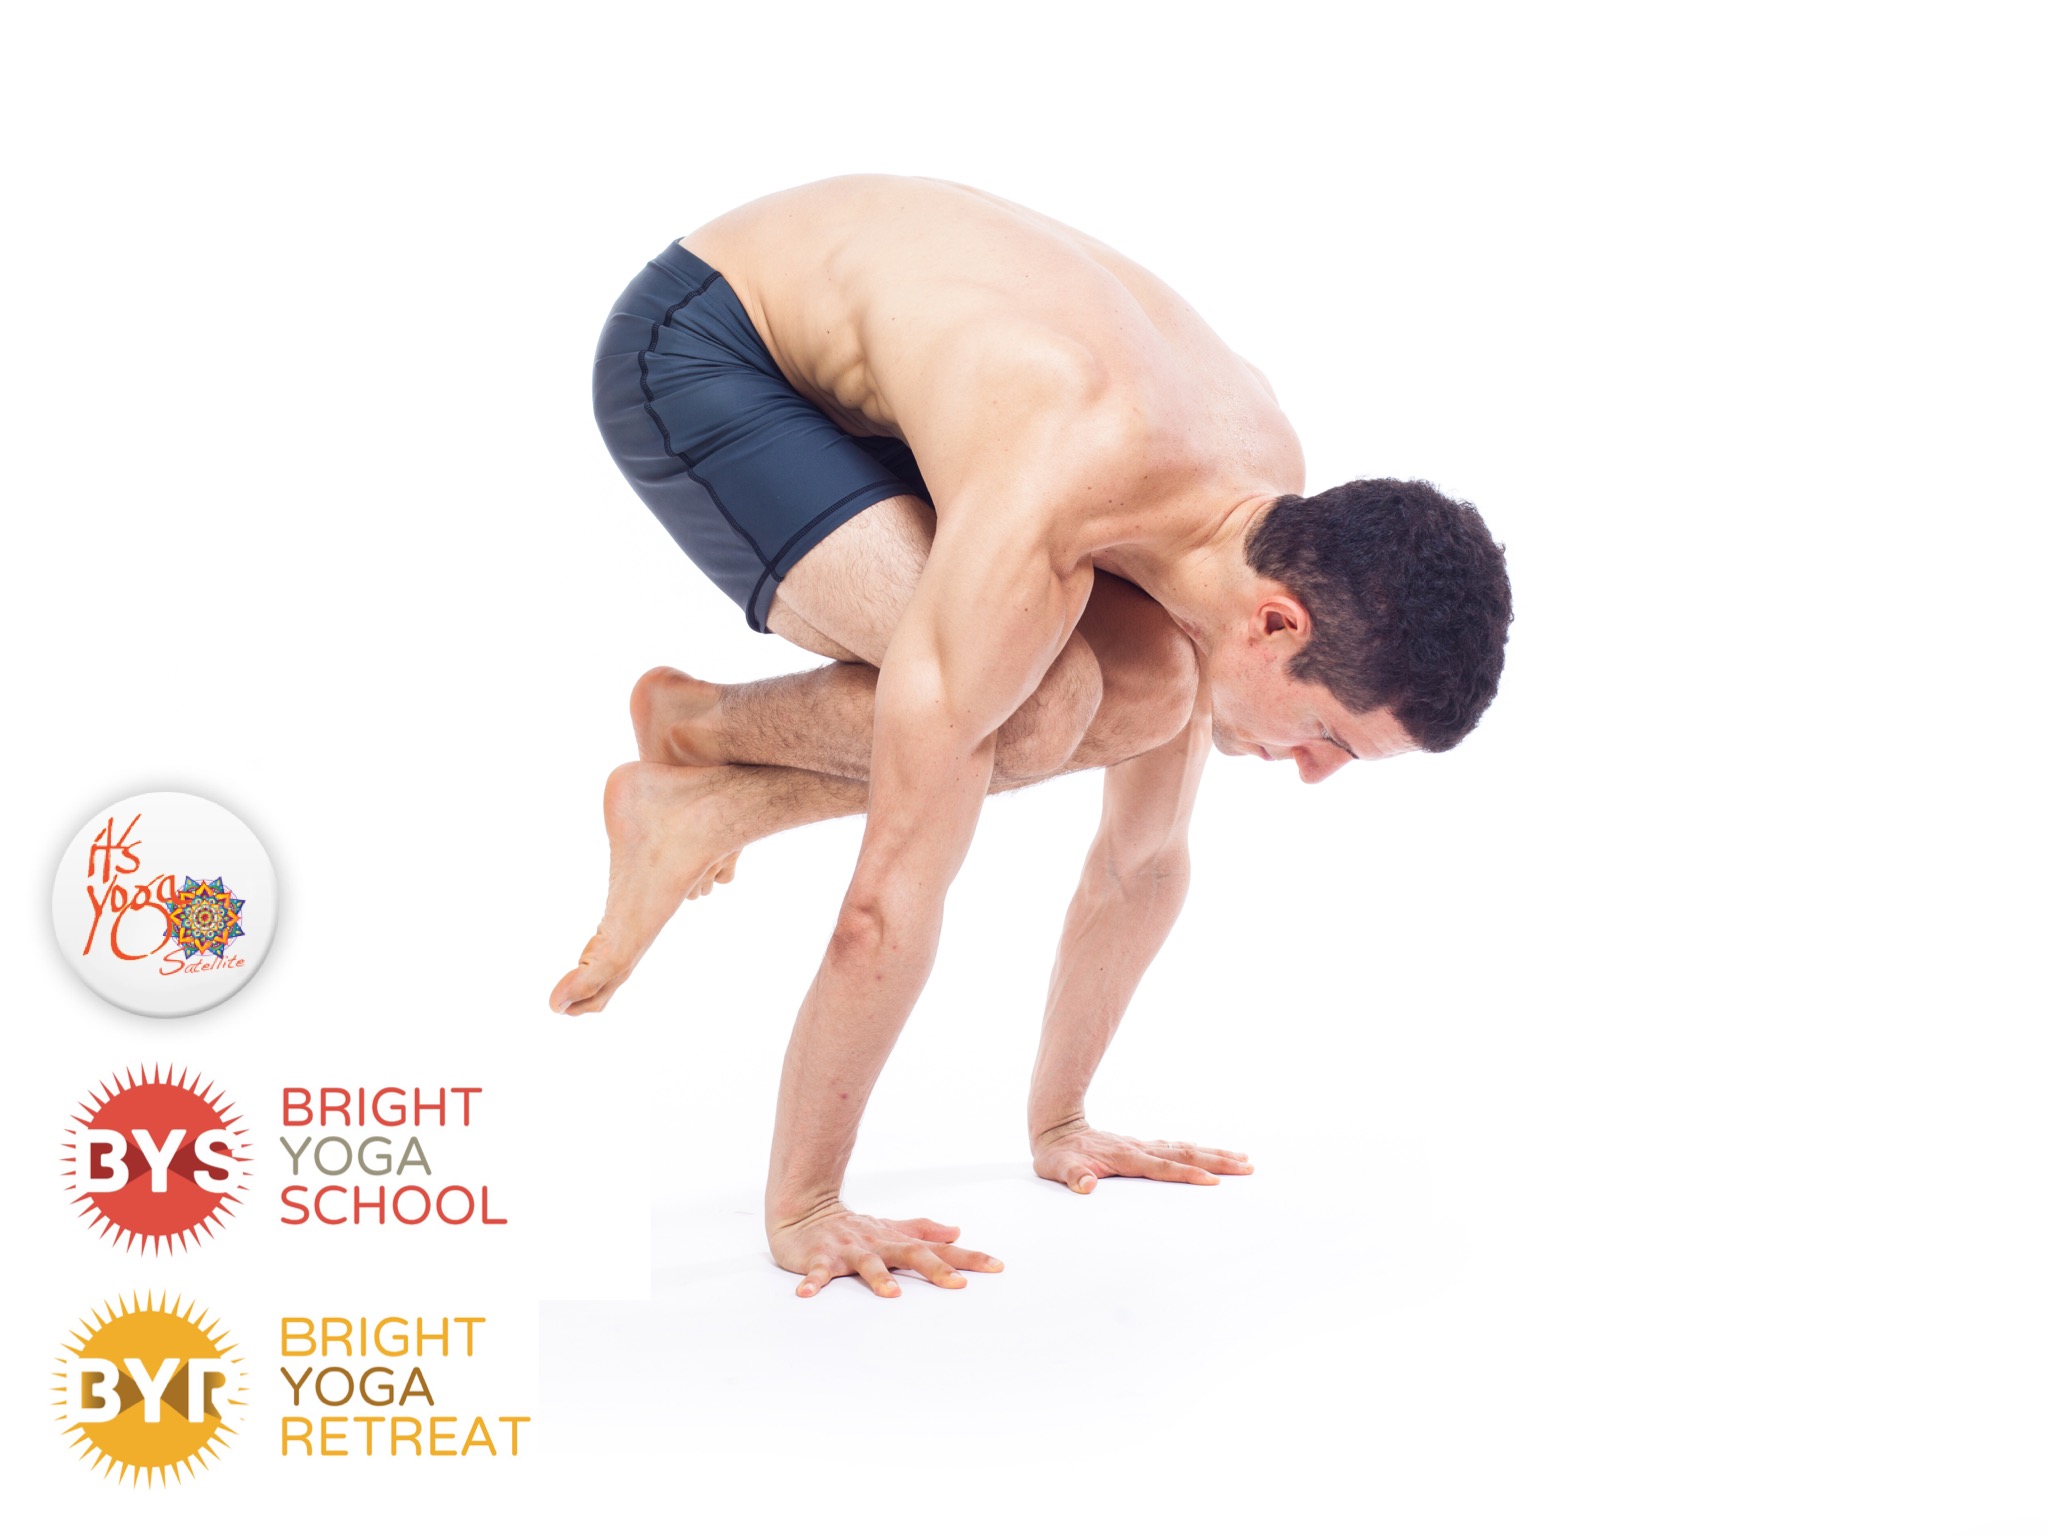
Supta Kurmasana is one of the deepest hip openers in Primary Series of Ashtanga Vinyasa Yoga. This posture require: deep external rotation in the hips, deep flexion in the spine and a deep inner rotation in the shoulder join. If you have any restriction in your body in these areas, you should considerer the idea to hold the previous postures for a bit longer in order to allow your body to slowly open.

In standing series, a deep Prasarita Padottanasana A will promote a deeper flexion in the spine. This action will support, not only Supta kurmasana, also kurmasana and other postures like Tittibasana, and Upavista Konasana. If you have hard time to get deep in Prasarita A is good idea to stay here for 8 breaths or more in order to allow your back to slowly open.

In seated postures, all the asanas from Janu Sirsasana to Kurmasana can help you to work really deep in all the anatomical movements mentioned above: external rotation in the hips, flexion in the spine and inner rotation in the shoulder.

In Janu A, B & C you will work more effectively in open the hips (external rotation) if you pay attention in ground the sitting bone of the bending leg. About the spine position, round your back in all the Janu Sirsasana will help you to train the core and open the lower back, getting you ready for Supta Kurmasana

To work in the inner rotation of the shoulders, all the Marichyasanas are great for this aim. In order to do this is very important to pay attention to the movement of the shoulder. When you bind keep the bending knee as close as possible to the side of the body and straight up, keep the heal behind the the Knee and press it down will help you to ground your foundation and work really deep in the shoulders and hips.

When you wrap your arm around try to reduce the space between your shinbone and your armpit, this will help you to work really deep in the inner rotation of the shoulder. In Marichyasana A & B move your chest forward and down and pull the knee backwards will help you to open the hips. If you can not get there yet, feel free to stay in all the Marichyasanas for 8 breaths or more, work with patient toward this.

Navasana, by squeezing the legs you will awake the lower abdominal region and if you slow down the breathing your core will get stronger. A strong core will help you to support the lower back when you put the legs behind the head in Supta Kurmasana

Bhujapindasana, will help you to work in your core in a deeper level specially if you jump into it, also holding your body weight in your arms will create strength back into the shoulder allowing you to bring more stability in this joint without compromise the flexibility you need to have for Supta Kurmasana

Kurmasana, in this asana is very important to keep your legs just a bit wider than your shoulders, when your arms are moving under the legs, bring your legs as close as possible to the shoulders, engage the quadriceps and lift the heals out of the floor. If this is possible Supta Kurmasana is about to happen =)

If Kurmasana as described above is not possible, stay for 8 breaths at least, specially in all the Janu Sirsanas and Marichyasanas.

Feel free to share this information, help us to spread the love of the practice

Thanks for reading

Namaste

Finding Mula Bandha

In ashtanga Vinyasa Yoga, teachers and practitioners describe three main spinal Bandhas: Mula Bandha, Uddiyana Bandha and Jalandhara Bandha

These are the most subtlest part of the practice, only after you have been open up your body through the practice and sharpen your awareness will be possible for you to start to feel these energetic locks within the body.
However if you approach to the Bandhas in certain ways you can create a deeper and quicker connection who can serve you to move with lightness, and injury free through the practice.

The easiest way to start to connect with Mula Bandha is by knowing the physical location. Mula Bandha the root lock is located in the pelvic floor area for men and for women is also include the muscles of the cervix, by knowing the location you will know where to rest your awareness in order to get in touch with this lock.

If you can not feel your pelvic floor and muscles of the cervix, Mula Bandha can be awake by activating the toes, quadriceps and specially the inner tights, by keeping these muscles active you will notice a huge and positive change in your practice.

When to do this?
If you want to awake Mula Bandha the easiest way is by getting in touch with these muscles as often as possible

Since you start the first Samasthiti of the practice all these group of muscles have to turn on, by doing this you will notice the following qualities in your practice.
1. Lightness in the lower limbs
2. Lengthening in the lower back
3. Engagement of the lower abdominal region
4. Jumping back and through can get easier
5. Jumping in Sun Salutations will fell much lighter
6. Your backbend practice will feel pain free and deeper, if you have enough flexibility in the upper body
When Mula Bandha is properly use you will have a clear sensation of feeling grounded and light at the same time. Please remember that this lock will assist you in maintain prana (life force or vital energy) inside of the body for a longer period of time and it will assist the movement of prana within the physical and energetic body, because of the subtle nature of the Prana the muscle activation in the areas described above should be just enough to feel grounded, supported and light through the practice without compromise the flexibility and the quality of the breathing

The quality of the breathing will help you to understand how much effort you have to apply when you engage these areas. To much effort will reduce your ability to breath, under activation of these muscles will give you a lot of freedom in the breathing but not enough support during the asana practice, find a middle way of activation is ideal.
Is like playing guitar to much tension in the string and the string will broke, to lose and it will not create sound only with the right amount of tension you will be able to create a proper sound

Apply this and let us know how your practice change

Thanks for reading feel free to share

Namaste

Rocket gets you there faster

Rocket are a very dynamics yoga routines base on Ashtanga Vinyasa Yoga created by Larry Schultz. This sequences will help you to build up strength in legs, core and shoulders, at the same time it will help you to create flexibility into the hips shoulders, allowing you to free your back

Larry use to said “flexible spine young body” the reason behind this is that a flexible spine will allow the energy to move freely reaching different parts of your body, this will help you to remove tension and energetic blockage assisting you in develop a deeper inner connection within yourself

More than a single routine rocket vinyasa yoga, is a system that you can follow and see result in your mind and body.
Larry was a genius in sequencing, he was able to recognize what your body lack. The rocket routines specially leaded by him, he was able to guide you through the journey with so much happiness, love and compassion, that by the moment you walked out of the class some of his wisdom hit you in the right place, he was able to help you to realize the best of you.

During my training with him in 2010, I understood how important is to have a teacher who is genuine in his teaching, a teacher who “teach what he practice and practice what he teach”, because his own consciousness and dedication in his sadhana help him to see a better version of yourself even when you was not able to see it

I feel blessing to find him and share time with him, he brought so much light into my life, that is why share this practice is something who make me feel passionate about it

Thanks very much to all my teachers specially to Larry to showed me the light and to taught me to listen the inner teacher

With Gratitude and love

How to work in folding forward in a safe way?

In many Yoga styles folding forward in both standing and seated is practiced very often, having the right understanding in how to use your body when you fold can help you to support your practice in a long term without injury.

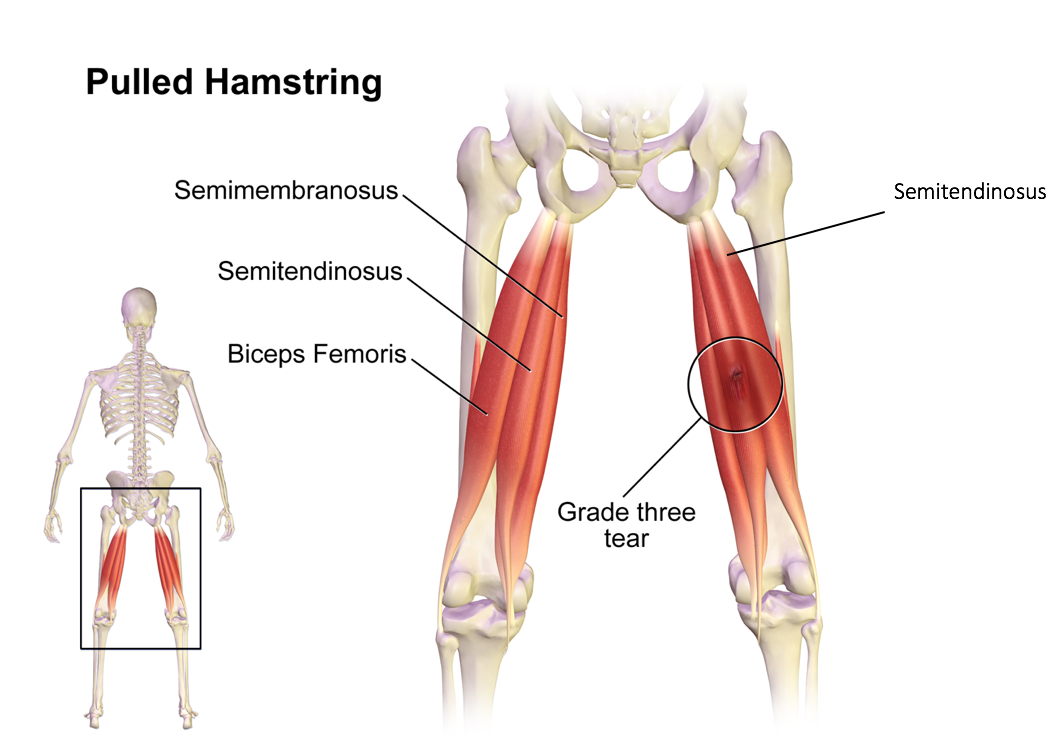
One of the most common injuries these days is tear of the hamstring (body of the muscle) and tear or avulsion of tendon at the origin (semitendinosus, where the muscle meets the tendon). If you ever got this injury you will know that is take long time to heal, because the hamstring is one of the group of muscles we use more often. When we walk the quadriceps is slightly engage while the hamstring will be slightly stretch, that is why heal this type of injure will require lot of awareness and time in order to heal it

Having a closer look of the anatomy of the Hamstring will help us to have a better idea about the most common injured areas. In our body the muscles always support each other in order to create stability and movement, every time when you extend or flex any limb, in one side of the limb will be always a contracted group of muscles (agonist) and in the appositive side will be a stretched group of muscles (antagonist)

Having this in mind, in order to stretch the muscle in a safe way we have to pay attention in engage the opposite group of muscle. In case of the hamstring contracting the quadriceps will help you to stretch the hamstring in a safe an effective way. However, in order to make sure that the stretch is happening at the body of the muscle and not at the tendon, is very important that you apply the following tips in your practice:

  1. Move the hips forward in line with the heels, this action will force you to really engage the quadriceps, activate the toes and reduce the tension at the origin of the muscle
  2. Most of the body weight should be at the ball of the feet
  3. Heels grounded
  4. Engage your core when you move your body weight forward

This action will help you to stretch the hamstring in a safe an effective way.

In case that you already have any of the injured mentioned above a mindful way of practice can help you to speed up the healing process. Here there is some advises we have been sharing with our students:

  1. Fold forward just enough, respect your body condition at the moment, this will help you to create a sense of self support and acceptance
  2. When you fold forward keep the top of the hips pointing upward as much as possible, this will keep the sitting bone pointing downward, reducing the tension on the tendon.
  3. Allow more blood to reach the injured area, this will facilitate the healing process. This can be achieved by lean your legs against the wall, 10 minutes every day (make sure that you use a pillow to support your sacrum). Increase the blow supply will also increase the amount of nutrients and oxygen into the injured area

After applying this our students not only healed faster, they also found more comfort and ease within the practice

Let us know how is works on you

Feel free to share

Namaste

What does the `It’s Yoga´ System offer you?

The It’s Yoga System, which was designed by Larry Schultz, has produced thousands of high quality yoga teachers all around the world since 1989. It’s Yoga’s mission is “to share the love of the practice,” and, as Larry Schultz used to say, “teach what you practice, and practice what you teach.” More than memorizing a script, we, at It’s Yoga Satellite, encourage our students to teach from their own experience and understanding of the practice as we guide them into understanding the true meaning and message behind the practice of yoga. How Larry taught according to his personal experience and understanding of yoga into his teaching is what made his style of teaching truly unique.

After studying under the guidance of Pattabhi Jois for seven years, Larry began to teach yoga to western students, and he soon realised that most of the postures (most especially the deep hip openers) in the Ashtanga Vinyasa Primary Series were not accessible to most of his students. Having prior experience in the Intermediate Series and some postures in the Advanced Series, he created the Rocket Yoga routines with the intention of giving his students an opportunity to experience the benefits of the practice in a deeper level by opening their bodies in a faster way.

Our system offers a full week schedule of practice, each day a different routine that works on different parts of the body, promoting a sense of harmony within the body and mind. The schedule is sequenced in such a way that the routines each day will help you to build up the foundation for the following day. Each week, we end with a Rocket 3practice, which Larry used to call “BBQ Rocket,” and this helps to recharge the entire body as it allows you to move, bend, and twist into many different directions by using every single muscle of your body.

Here is the It’s Yoga weekly schedule, which we encourage our students to follow as they do their daily self practice:

Sunday – Ashtanga Vinyasa Yoga Full Primary Series

Monday –  Rocket 1

Tuesday– Rocket 2

Wednesday – Rocket 2 (Modified)

Thursday – Ashtanga Vinyasa Yoga Full Primary Series

Friday – Rocket 3

Saturday – (day off)

During our 200-hour and 100-hour courses, you will have the chance to experience the benefits of two strong traditions – Ashtanga Vinyasa Yoga and Rocket Vinyasa Yoga. Countless of practitioners who have trained with us have perceived the numerous benefits of these two yoga systems, all of them noticing a huge improvement in their own body and mind, even after just 22 or 10 days of practicing with us. We offer well-rounded teacher training courses that have a great balance between Asana practice, Anatomy, Yoga Philosophy, practice teaching, and so much more.

Here are some feedback we have received from some students that have attended our Teacher Training courses this year:

““These past 3 weeks really made a huge impact on me and helped to map out so many things and bring different ideas together. One of the most eye-opening messages for me was explanation of Karma and that nothing is about being good or bad; it’s just every action has consequences, and if something is not complete, you will get situations that will bring you back to work on whatever is not complete. It made me realize that we shouldn’t judge other people in any circumstances because everyone is going through their own journey.

I am aware that I am at the very beginning of this journey, and I look forward so much of what else it will bring me. And I am incredibly grateful to you, Joy and Ricardo, for all the beautiful knowledge and energy that you shared with us these three weeks. Namaste :)”” – Kseniina Lobanova

““Along with many corrections, memorizing the sequence front to end, and end to front, learning new techniques, my biggest and most special lessons came from those moments where Joy and Ricardo spoke about their philosophy and own experience with the practice, and how it can be a path to own spirituality. Yoga went from being this fun practice to a deeper philosophical and spiritual path. The lessons on self-awareness, Buddhism, the origins of yoga, among many others, brought a whole new dimension to my love for this practice.

Thank you Joy and Ricardo, my gratitude for your lessons go beyond what my words can express. I felt so much support from your energy, I felt you both cared deeply and were there to help me overcome physical and mental barriers. I feel so lucky to be able to call you both my teachers.”” – Ludmila Pontremolez

Take the next step in your yoga journey with wisdom, train with us and gain a deeper knowledge on the practice, wider your perspective about the practice, theory and philosophy behind this system

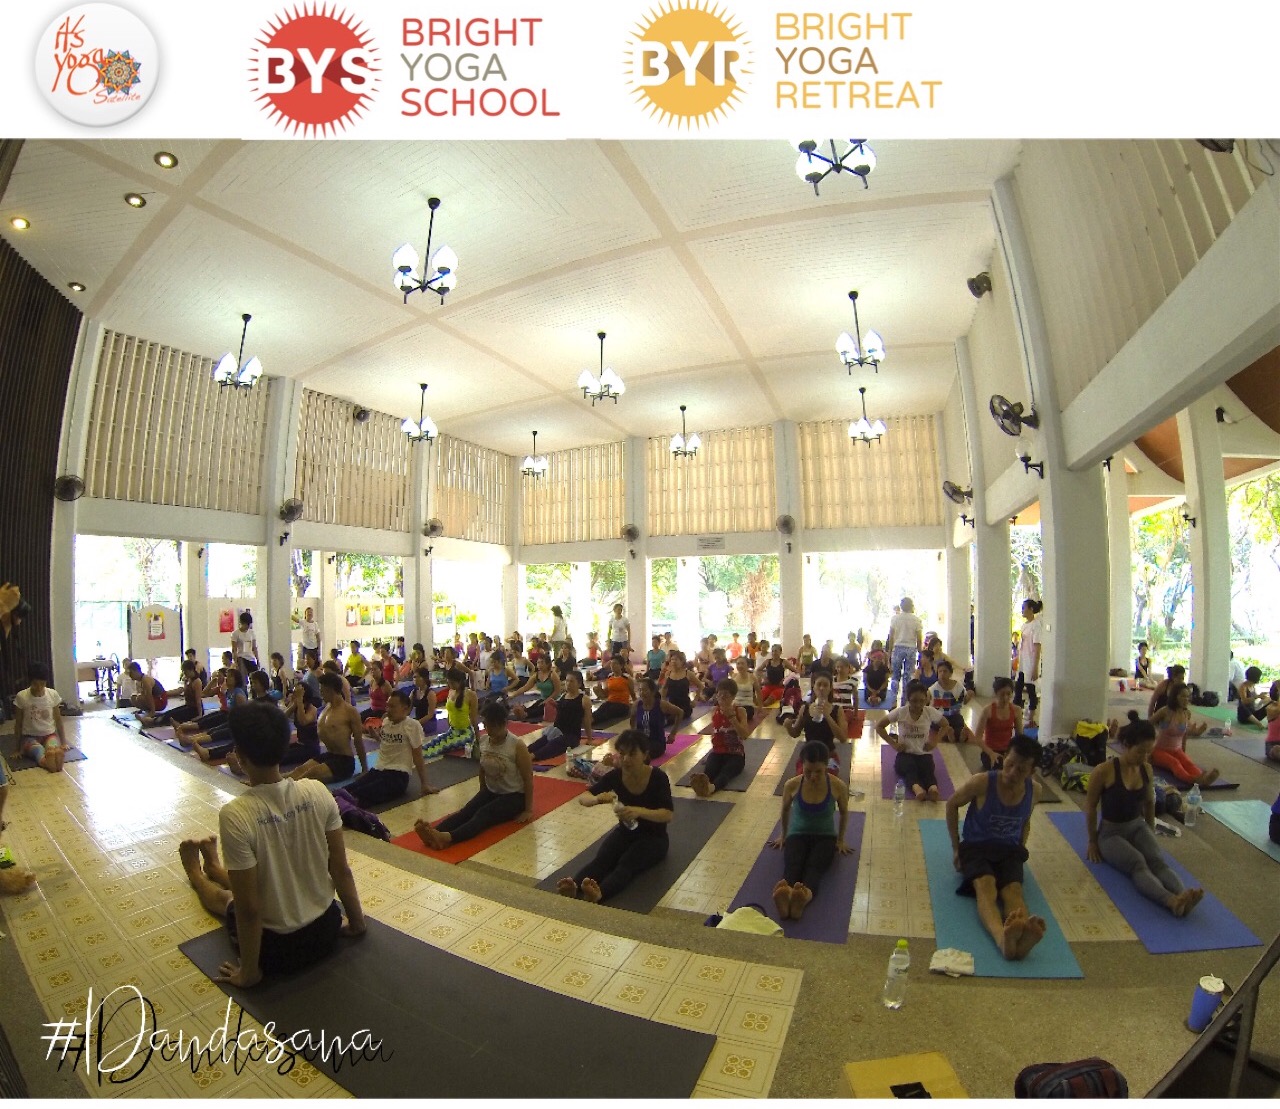
Dandasana Technique

This posture is like Samasthiti for seated postures.
After a vinyasa in the seated posture, come back to Dandasana will allow you to create stillness in the practice, come back to your breathing and Bandhas and build up the foundation for the next posture

The benefits of Dandasana are.
1. Help you to lengthen and strengthen the muscles in the lower back
2. Will train you in how to use your legs in order to lengthen your back when you seat
3. Build up concentration
4. Prepare your body for the next set of postures
5. This posture will constantly remind you that in seated postures your body have to be engage.
6. Because gravity will be working more intensely on you in seated postures. Activate the legs, pelvic floor and core will help you to lift up against this donward force. By doing this in each Dandasana you will be able to train your body in how to engage the muscles in order to seat

At the beginning the posture can be really challenging specially if your hamstring are tight, in this case feel free to bend the knees or seat in something higher will allow you to tilt the hips forward, this will help you to seat with your back straight without feeling pain in the lower back

Let us know how this work on you
Keep practicing
Ricardo and Joy

How Yoga Teacher Training Can Truly Support Your Practice and Teaching Skills

After almost 10 years of practice and having led Yoga Teacher Trainings over the last 5 years, I would like to share some of the things that I have repeatedly been observing through the countless hours of practice and training with yogis and yoginis from all over the world who come to join us to deepen and strengthen their yoga practice. I, together with my partner, Joy, are committed in sharing our love and knowledge of yoga, always leading our Teacher Trainings with the intention to support our students to help them truly understand their practice on a deeper level, and to help them build up a good foundation on how to teach yoga. Through this, we, as well our students themselves, witness many amazing transformations during and after our Yoga Teacher Trainings – transformations not only on their bodies, but also in their minds.

We have seen a number of students walking into the course with injuries, insecurities, inhibitions, and self-doubt – some with hardly any skill in their own practice, more so any skill in leading a class as a teacher. But we have seen these same students walk out of our course with a lot of new knowledge and confidence to continue on their yoga journey, for some as practitioners for others also as yoga teachers.

We believe that a committed self-practice is what can truly support your teaching skills by helping you deepen your understanding of the practice, day in and day out, as you get on and off the yoga mat. It does not matter how many yoga courses or workshop because neither of those will bring you deep enough. It is only through self-practice that you can truly look within you to find your own truth, whatever that may be – this is a path that you will have to walk alone; your teacher is merely there to point you to the right direction. In other words, your teacher is there to guide you where to look, but it is up to you to seek what you are looking for.

Even after our students have finished their yoga teacher trainings with us, we make it a point to keep communicating with them. We are always try to be open to answer any questions they might have about the practice or about teaching, as we know that this yoga journey – both of practicing and teaching – is a constant journey, that continues more importantly even when you have stepped off of your yoga mat. In the same manner, we always encourage our graduated students to come back and revisit us in order to have a closer look into their practice so that we can do our best to address their questions. More than a single encounter, we want to nurture a more long-term relationship with our students, and this is the kind of teacher-student connection we want to encourage our students to have with their students, as well.

Our yoga teacher training is a great starting point in delving deeper into the practice of yoga. Our students are able to experience deep transformations through 24 intensive days of daily learning and practice, which undoubtedly opens them to look into and reach a deeper part of themselves.

One of the things we offer during our course that reinforces the process and practice of mindfulness is meditation practice, specifically Vipassana Meditation. This type of meditation allows students to better understand their practice, and, if necessary, adjust their approach towards the practice. Asana practice, while it is a vital part of our teacher trainings, is just one limb of the true essence of yoga. The physical postures are not the most important aspect of the practice; they are merely powerful tools we can use to transform not only our bodies, but also our minds, which, in turn, will inevitably change our perspectives, our relationships, and the overall quality of our daily lives.

This is what we believe, and this is what and how we teach. My teacher, Larry Schultz, used to say, “Teach what you practice, and practice what you teach.” Since the day he taught this to us, it has been how we approached the yoga practice and life itself.

How to improve your Ashtanga practice

Ashtanga Vinyasa Yoga is structured in a progressive manner such that your awareness, engagement, and attention in the previous postures affect the succeeding asana. For example, in order to support the seated postures, we must first work in building up awareness and attention through the standing sequence.

Here are some general tips that can help you improve your standing sequence practice:

1. Always follow your breathing. The breathing comes first, and then the movemement will follow.
2. Engage your quadriceps, toes, and inner thighs. This action will activate the Mula Badha and the lower abdominal region.
3. In symmetrical asanas like Padagusthasana, Padahastasana and the Prasarita series, always shift body weight towards the balls of the feet while keeping the heels grounded, the toes pressing down, the belly tucked in, and the quadriceps engaged.
4. In asymmetrial asanas such as Trikonasana and Virabhadrasana, most of the body weight must be on the back foot. Legs should always be active in order to avoid collapsing with gravity.

Keep these techniques in mind as you go through your standing postures, and eventually apply the same principles to the seated sequence. Your practice will surely feel lighter, allowing you to access more subtle aspects of the practice such as breathing and badhas in a more effective way.

Just keep practicing, and let us know how your practice progresses.

Ricardo and Joy
It’s Yoga Satellite

Backbends Practice

Backbends are very complex postures that require deeply getting into an extended spine. Ideally, when doing backbends, one should feel a deep stretch in the front part of the body without feeling compression around the lower back. A number of practitioners often report a lot of pain in the lower back and glutes after practicing backbends – if this kind of pain only shows up during the practice, there is something that the practitioner has to be aware about, and he/she must pay more attention to his/her foundation when moving into backbends. However, if the pain is reflected thoughout the day, it is a clear sign from the body that there is something that must change in the way the backbends are practiced.

In order to understand how to work into a backbend safely, it is important to have a look into the anatomy of the spine, and to find out how much flexibility and strength you need to have in different areas of your body to get into deep backbends.

Our spine is made up of many small bones called vertebrae, and in order to get into a backbend in a safe way, it is vital that we integrate all these vertebrae into the movement – this is how we can create space in our back before bending it into a deep extended position. A single vertebrae cannot move that much on its own; however, when we integrate the small movements of all 26 bones (including the coccyx/tailbone), we can create a big range of movement in our spinal column.
The human spine is in between two major joints – the shoulder joints and hip joints. If any of the muscles around these joints are stiff, backbends will be more challenging to achieve without feeling pain or discomfort. That is why it is a good idea to first practice asanas that can open up the hips and shoulders before getting into backbends.
Here are a few causes of lower back pain when practicing backbends:
1. Lack of mobility in the Thoracic Spine due to a lack of shoulder flexibility.
2. Tension on the hips, especially on the hip extensors (glutes). When the glutes are tense, these muscles will compress the lower back, creating tension around this area.
3. Tension in the hip flexors. This is the group of muscles that allow the leg to flex. If these areas are tense, it will restrain movement around sacrum and lumbar spine. This will create lot of compression around the lower back and a rounded spine position (kyphosis). In a long term this can produce shoulder and neck pain also.
One of the easiest ways to open the shoulders and hip extensors in to sit on something elevated (high enough that your feet do not touch the ground as you sit on it) – such as a sturdy and stable table that can carry your body weight. Sit on the edge of the surface, then lie down, allowing your legs to hang down. Relax, and stay here for 3 minutes.
To open the shoulders, one good technique is to lie down on the bed with your shoulders just at the edge of the mattress. Allow your head to hang down freely, and release your arms backwards. Stay here for 2 minutes or as long as you feel comfortable.
In order to improve flexibility in the hip extensors, postures such as Eka Pada Rajakapotasana (Pigeon Pose), Dwi Pada Rajakapotasana (Double Pigeon Pose), and Gomukhasana (Cow Face Pose) are excellent asanas to stretch out these muscles.
It is important to remember that it is just as important to build strength just as much as flexibility. Certain areas of your body must be strong enough to support you in your backbends. These areas are: quadriceps, inner thighs, abdomen, and pelvic floor.
Strength can built up through consistent practice. Even as you start your practice by moving through Sun Salutations, already bring your awareness to subtle activations in certain areas of your body – press the toes down firmly, pull the quadriceps up, squeeze the inner thighs inward – all of which will activate the pelvic floor.
Keep all these techniques in mind as you go through your practice, and observe how you will gradually build enough flexibility and strength to support your backbends. Give it a try, and let us know how you feel!