Chaturanga The master Key For Arm Balance

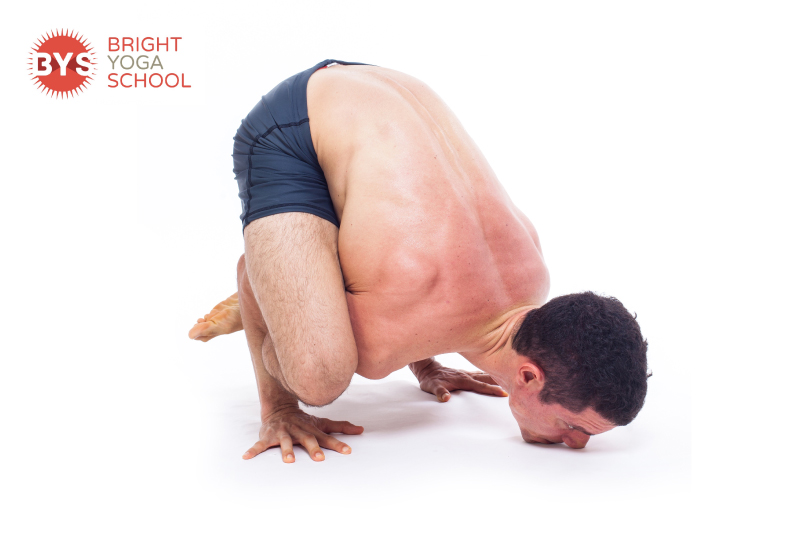
Chaturanga. The Master Key for Arm Balance

Chaturanga is the first challenge that many students face when they enter Yoga.

Many students mention that it is impossible for them to hold their body weight in any horizontal position and didnt see the point in why they have to do so many Chaturanga.

In systems like Ashtanga and Rocket, Chaturanga allows you to build the foundation for any arm balances and transitions that are waiting ahead in the practice.  Furthermore low push up, as some teacher calls it, builds a huge amount of tricep, shoulder, and core strength.

Strong abdominal muscles will not only support you for any arm balances, but it will also allow you to support your spine as you do flexion (fold forward), extension (backbend), side bends, and twist. More than from an asana perspective, having a stable core will provide stability for the back which is necessary to avoid any injuries like slip disc, lower back pain and so on.

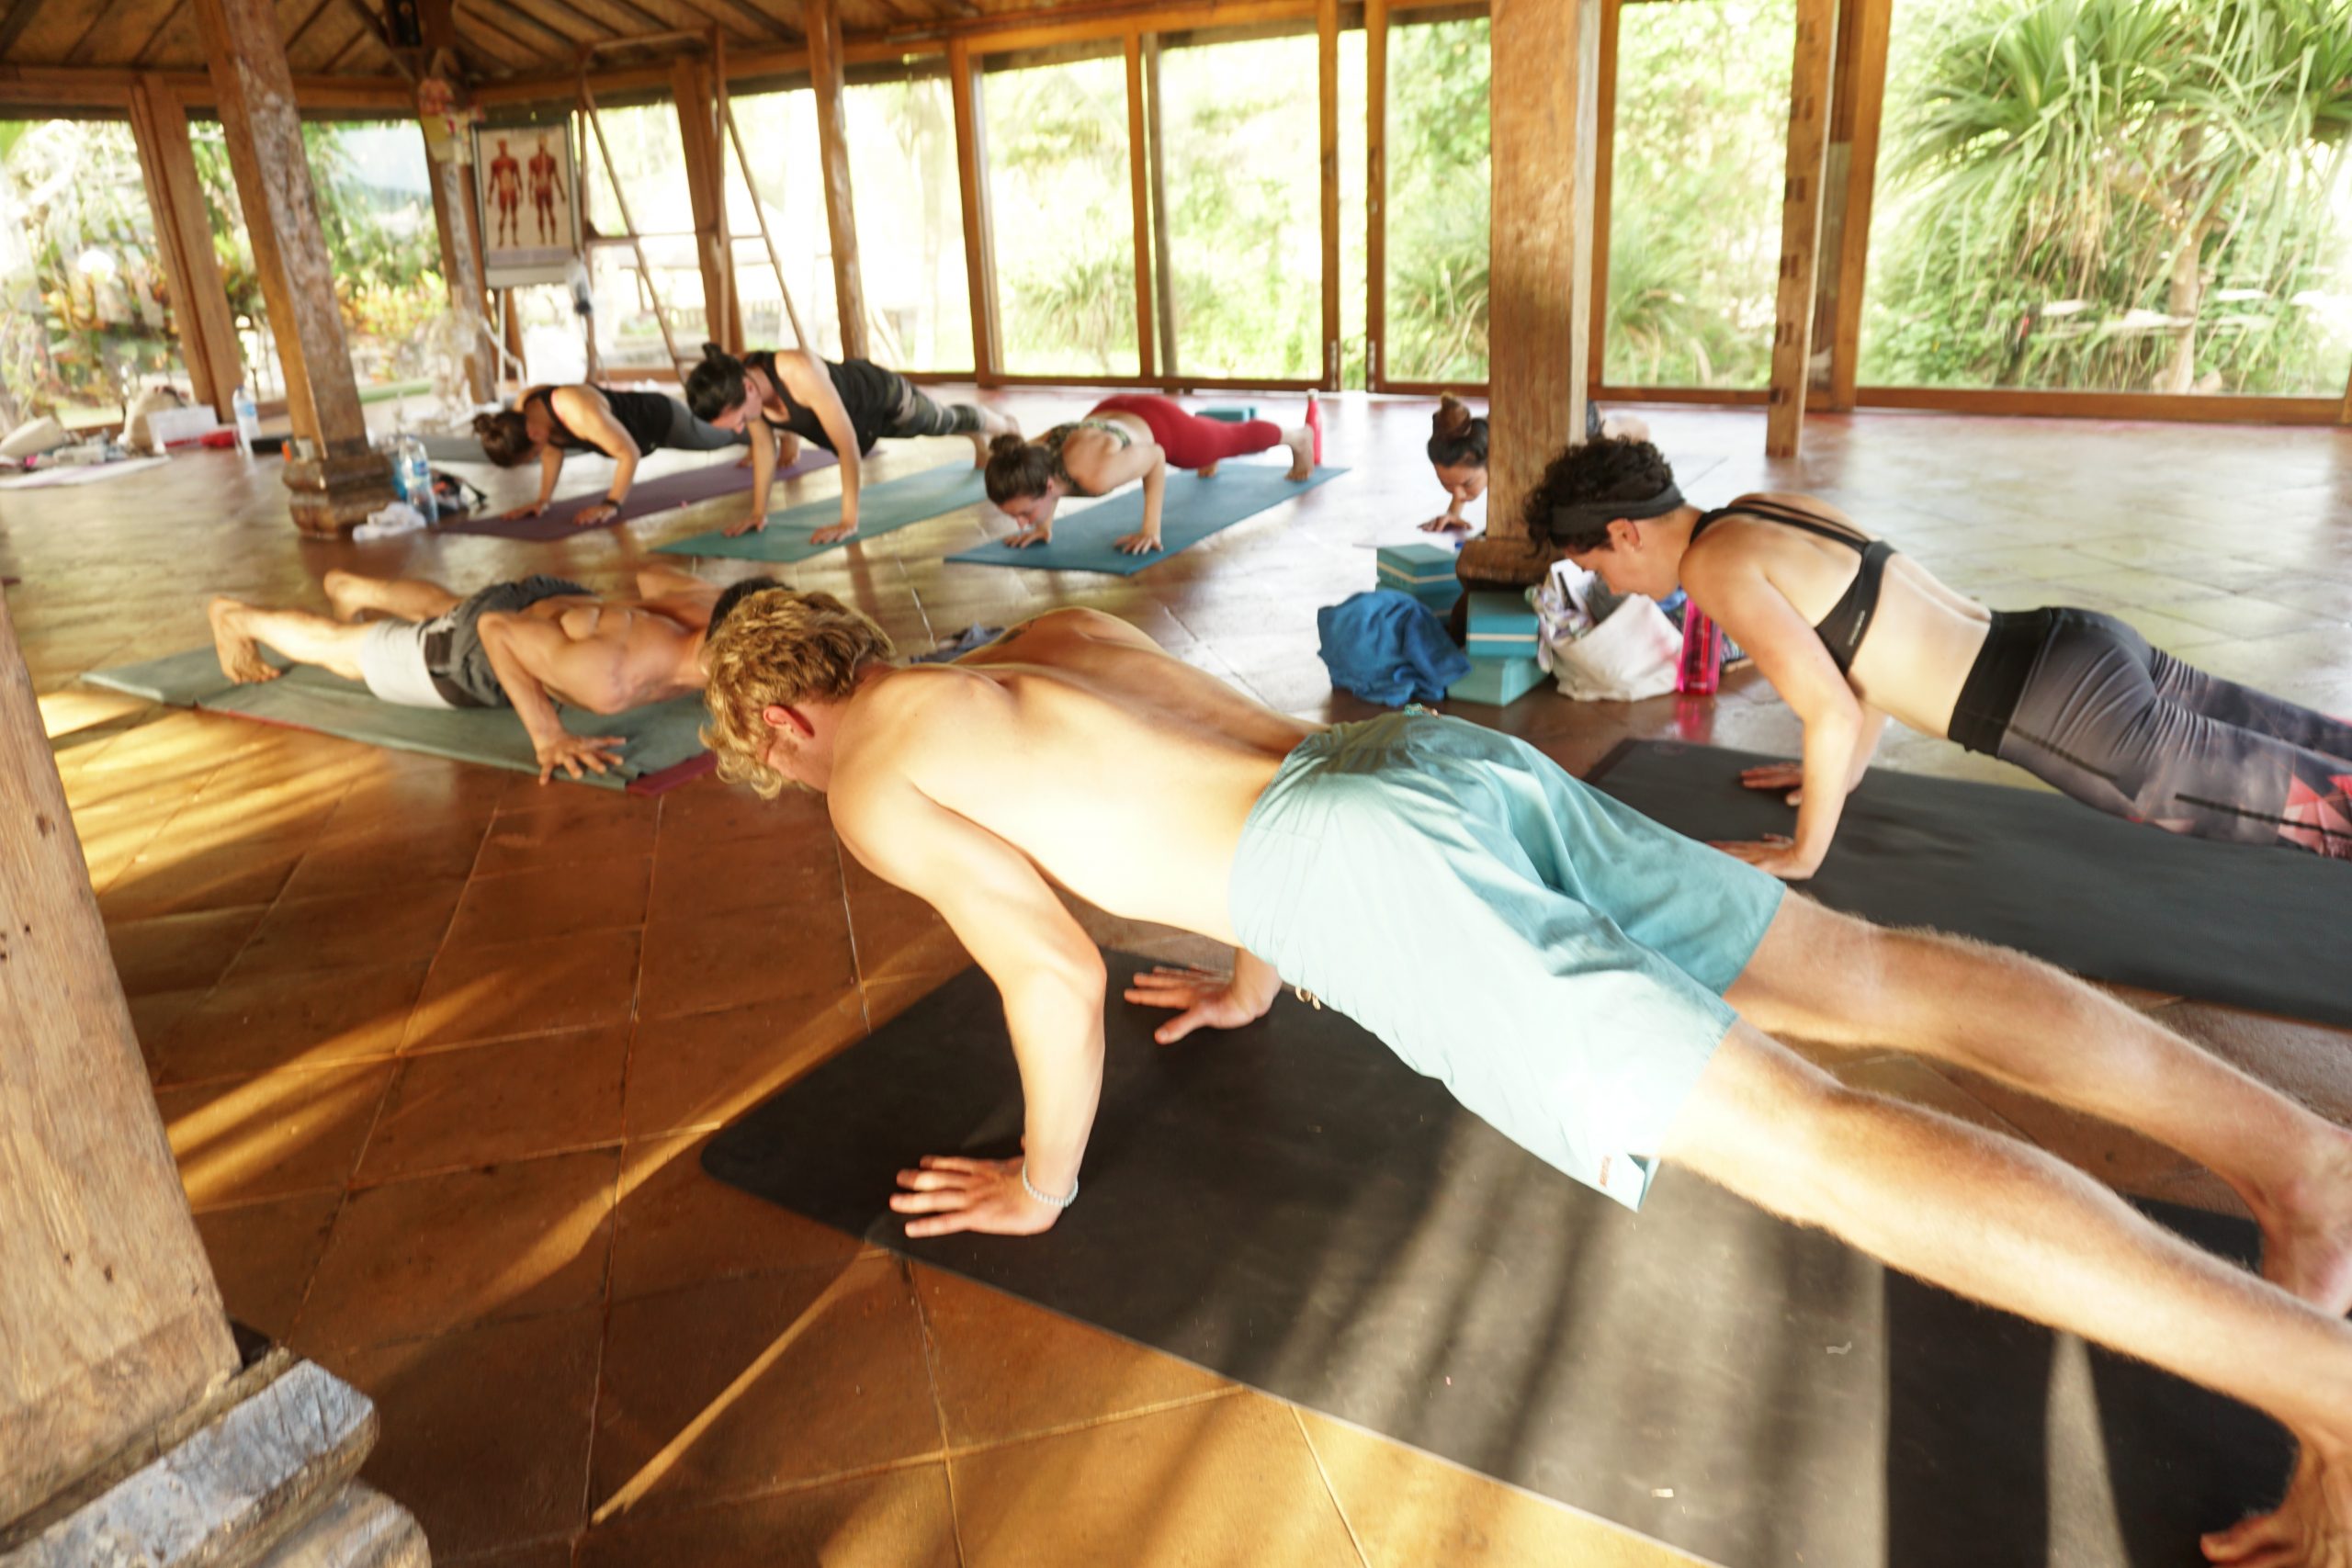
As you approach this asana, remember that it is not the point to go in the full expression of the pose yet if you dont have the necessary strength to come back up or if you are holding your breath. It will be more beneficial to drop the knees, bend the elbows just enough for you to hold the pose and be able to move into Urdhva Mukha Svanasana with smooth breathing.

Now we breakdown on how we can effectively modify to train the body and the breath in chaturanga.

First, before bending the elbows, it is important to move the bodyweight forward. By doing this, it will move your shoulders in front of the wrist that will force you to use rectus abdominal (front of the belly), external obliques (side of the belly), and triceps (back of the upper arm) more. This is going to happen in high plank before you even start to bend the elbows. This little adjustment in your practice will ensure that you prepare the foundation before getting into the full expression of the pose.

Second, we move to how we breathe. I will share with you a very important secret. The secret is to completely clear out the breathing. When you entirely empty out the breath, something fantastic happens. The diaphragm will move upward that will automatically engage the rectus abdominal and oblique muscles making the pose lighter and more accessible.

Use this tips and you will see a change in your practice immediately. Keep using it and you will awaken and be surprised of the huge amount of strength in you.

Supta Kurmasana According to Body Proportions


Supta Kurmasana is one of the core postures in Ashtanga primary series. This pose requires: deep internal rotation in the shoulders, flexion of the spine, external rotation on the hips and flexibility in the adductor muscles

Internal rotation of shoulders

In the sequence, some poses will prepare you for the shoulder rotation that you need, asanas like Prasarita Padottanasana C, Parsvottanasana and Marichyasana A- D

If you can put the legs behind the head or cross the feet in front of the head, but you cannot reach your hands behind the back, staying in the poses mentioned above for 8- 10 breathes it is going to help you to lose the shoulders and create the need it flexibility for Supta Kurmasana.

External rotation on hips

In case that you can bind the hands but can’t cross the feet, this will be due to a lack of ability in externally rotating the hips. All the Marichyasanas will help you to work in this mobility

You can also hold Kurmasana for 8- 10 breathes keeping the legs close the side of the body and lift the heals up, this will work as well in the external rotation of the hips

Flexibility in the adductor muscles

In the standing sequence, all the Prasarita Padottanasana are excellent preparation. Bring your torso thru the legs and hold all this variation for at least eight breathes

Flexion of the spine

To achieve deep flexion of the spine, it is necessary that you can round your spine. Poses like Janu A-C will work in the mobility of the spine, instead of work with the back straight, try to bring the shin or the forehead to the knee, as you keep the hips grounded

If you have all these qualities but still can’t get into the poses, it is time to have a closer look in the proportions of the body.

Short arm and legs and long spine

This combination will make this asana extremely difficult as you will need a deep external rotation in the hips, deep internal rotation in the shoulder joint and even so, perhaps you will still need to use a strap or towel to facilitate the bind

Possess that can help you to deepen the internal rotation is Parsvotanasa and Marichyasanas. Move reverse prayer hands in Parsvottanasana and the bind in Marichyasana higher in the back

To work in the external rotation, according to the proportions mentioned above, some new poses have to be added out of practice.

Pigeon Pose

With the right shin bone parallel to the top of the mat and the foot in line with your heart center, rest your upper body down.

To go deeper in this pose walk your hands to the left away from the sole of the feet

Approach to this asana as a Yin Yoga pose, surrender and let the gravity facilitate the stretch

At the beginning can be right that you use props to assist you as you hold this asana

Stay in the pose for 2- 3 minutes

Wider Baddhakonasa

Put your legs in a diamond shape, bring your upper body down. Your face should be behind your feet and your knees as close as possible to the ground. Stay for 2- 3 minutes

Second variations walk your upper to one side stay 2- 3 minutes followed by the other side

Advise

It is also important to recognize, that if you have had a regular practice and after trying many alternatives exercises Supta Kurmasana didn’t improve, take a modification instead.

Use a modification that can bring you as close as possible to the full version of the pose that is not creating any pain in the ligaments and joints and move forward in the sequence.

Pattabhi Jois used to say that not all the poses are for everybody.

Practice with awareness and let your body gradually open, always feel your body and breathe as you move thru the sequence.

Marichyasana D Technique

Before we move on to some technical details on how to get into the asana, let’s first mention some of the signs that can let you know whether your body is or isn’t ready to get into the full version of this posture…

It is important to be able to bind deeply in Marichyasana D. If you get into this asana and there is still space between the armpit of the binding arm and the shinbone, it means that you have to pay more attention to the flexibility in either the thoracic spine (twisted position) or the internal rotation of the shoulder of the front arm. In this case, it will be advisable to work deeper and stay longer in postures like Parivritta Parsvakonasana – work on creating a deep bind in this standing twist by internally rotating the bottom shoulder, and your armpit must be connected with the thigh (or as close as possible to it). At the same time, send the top arm forward, open the chest and keep the back foot grounded

All this tips will allow you to build up the foundation for Marychiasana D. If binding is already possible (and there is little or no more space between the armpit and the shinbone), but you are experiencing pain on the lotus knee, it is better to first work on opening the hips in order to use the anatomical function of the hips instead of twisting the knee whenever you attempt to get into a full or half lotus posture.

One of the many benefits of Primary Series of Ashtanga Vinyasa Yoga is that all the previous asanas (before Marichyasana D) will help you to open the hips without straining the knee. In order to do this, we have to mindfully keep the sitting bone of the bent knee grounded on the floor in all the asymmetric seated posture – this will ensure that the hip of the bent leg is properly open without creating too much tension in the knee. However, an exception to this is in Marichyasana A and B, where it is advisable to keep the sitting bone of the bent knee off the floor.

To work in the flexibility of the hips, feel free to stay more than five breaths in all the Janu Sirsasana and Marichyasana before Marichyasana D; doing this will prepare the hips for the deep external rotation you need to have in order to get into Marichyasana D. In the standing postures a similar principle in how to open the hips can be apply by grounding the back foot in all the asymmetric standing asanas.

If you can bind without a gap (between your armpit and shinbone) in Marichyasana C, and your knee is pain-free when you practice half or full lotus postures (especially in Marychiasana B), then your body is ready nearly ready to get into Marichyasana D.

How to get onto Marichyasana D on the right side:

Inhale, bend the left knee and hold left ankle from behind. Bring the left heel close to the belly button. Exhale, use the external rotation of the hip and place the top of the left foot close to the crease of the right hip (half lotus posture).
Lean on the lotus leg until the right sitting bone is off the floor and bend the right knee up to the chest; keep your right heel in line with the right sitting bone.
Inhale, extend the left side of the back (but the back should be slightly rounded). Exhale, lean across towards the right knee and bring your left armpit as close as possible to the right knee – at this point, is advisable to work on the internal rotation of the left arm in order to assist the thoracic spine into the twist.
Inhale, extend the right arm back and then rotate the arm inward so that your right thumb will be pointing down. Exhale, move the arm behind the back, connect both hands together as you continue to externally rotate the right shoulder.

To keep the knee of lotus leg safe, keep it down and allow the right sitting bone to come off the ground. Please notice that the breathing described above is a modification that will allow you to slowly prepare the body in order to get into the asana. When your body is open enough, we would like to advise that you to follow the correct breath according to the Ashtanga Tradition, which means that from Adho Mukha Svanasana (Sapta), on your inhale, jump to seated, and get directly into the twist.

The most important advise for this asana will be patience. When you accept your body’s limitations today and give enough time for your body to gradually open, you will begin to reap the benefits of the practice.

If you have any particular questions or concerns regarding Marichyasana D (or any part of your yoga practice), please feel free to email us at info@brightyoga.com

Have a good day, and enjoy your practice!

Bhujapindasana Technique


Bhujapindasana (Shoulder-Pressing Pose) is the first arm balance you will encounter when you practice the traditional Ashtanga Vinyasa Primary Series. This pose will require a lot of core activation, and a good way to strengthen the core is to practice Navasana (Boat Pose) and pay attention in all the jumping backs and through. However, Bhujapindasana, like many other postures, will require not only core strength, but also a combination between flexibility and strength in many different parts of the body.

Let’s break this posture down…

First step: preparation. In order to move the legs around the arms, you will need flexibility on your hip extensors (glutes and hamstrings) and adductors (inner thighs). If you can bring your legs around your arms – at least above the elbows – and cross your feet, this could be a good place to stay if you do not have enough strength to move forward to the next step yet.

Second step: crown of the head or chin down towards the mat. Use your exhalation to move all the way down. In this movement, you will need flexibility and strength in different parts of the body at the same time.

In terms of flexibility, your ability to flex the wrist will depend on the flexibility at the back of your forearm and the strength at the front of the forearm – these two groups of muscles will compensate each other in order to stabilize the wrist as you move your chin or head down. To be able to really engage the muscles at the front of the forearm, it is advisable to press the fingertips and the knuckles of your hands firmly down, especially the base of the thumb, index, and middle fingers.

From here, to get into the full version of the pose, it is also necessary to be able to extend your chin without collapsing the back of the neck too much – this leads us into the next aspect, which is strength.

With regards to strength, your core and shoulders have to be able to support you as you move all the way down, as well as when you hold the posture for 5 deep breaths. In order to do this, always keep your back rounded, as this action will help keep your belly or core active. Also, fully exhaling will engage the transverse abdominal muscles. Squeeze the elbows in just enough to engage the muscles on the chest (pectoralis).

Another tip, which can make a big difference in the posture has to do with the legs. Our legs are directly related with the Mula Bandha (the root lock) and the lower abdominal area activation. In order to awaken these areas, keep the toes activated and squeeze the inner thighs together.

If you are new to this pose, and you are worried about falling forward, place a pillow in front of you, or move yourself backwards on your mat, so that you will have a softer surface to support the impact in case you will not be able to control the movement yet.

Remember to always keep practicing and be patient with the process. Dedication and diligence will get you there and beyond =) Have a good practice today!